Release 12.3.13
12.3.13
New Import and Export Tasks for Choice Group and Employee
InfoGenesis POS has been enhanced to support new import and export tasks for the following menus using .csv files:
-
Choice Group
-
Employee
Earlier, these tasks were handled using .txt files. The import sequence for .csv files differs from the sequence followed for .txt files. The following sections provide information on the appropriate sequence to be used for .csv file imports. Additionally, the first row of the import file can either contain field headers or be empty.
Audit logging is not supported for these tasks.
Choice Group
Choice Group Export
The Choice Group Export is used to export choice groups from IGCM into a .csv file. The name of the file is CG_Exp and exported to the following location: <Drive>\InfoGenesis\etenant_id\enterprise_id\Division_id\Store_id.
Parent enterprise users can export base and group choice group records based on the selection in the CCM2 Group drop-down list (Reports ➜ Scheduling ➜ Task Setup ➜ Choice Group Export csv).
The following table provides information on the export specifications:
|
Sequence |
Field Name |
Valid Data |
Format |
Description |
|---|---|---|---|---|
|
1 |
Action |
U |
Text |
U - To add a new choice group or update fields in an existing choice group. |
|
2 |
Choice Group ID |
1-99,999 |
Numeric |
The choice group ID. |
|
3 |
Choice Group Name |
1-16 characters |
Text |
The choice group name. |
|
4 |
Display Name |
500 characters |
Text |
The choice group display name. |
|
5 |
Button Text 1 |
1-7 characters |
Text |
The button text 1. |
|
6 |
Button Text 2 |
0-7 characters |
Text |
The button text 2. |
|
7 |
Description |
0-1000 characters |
Text |
The description of the choice group. |
|
8 |
Min Choices |
0-255 |
Numeric |
The minimum number of modifiers to add the choice group. |
|
9 |
Max Choices |
1-255 |
Numeric |
The maximum number of modifiers to add the choice group. |
|
10 |
Modifiers |
|
Numeric |
Array indicating the modifiers in the following format: {action,modifier ID,sequence} Multiple values can be entered as comma-separated values. Example: {U,22,1},{U,33,2} |
|
12 |
Hide in POS |
0 or 1 |
Numeric |
|
|
13 |
Read Only in Child Enterprise |
0 or 1 |
Numeric |
|
|
14 |
Exclude for Child Enterprise |
0 or 1 |
Numeric |
|
|
15 |
Translation |
|
Text |
Array indicating translations for the choice group record in the following format: {“language ISO code”, “choice group name”,“button text 1”,“button text 2”,“display name”, “description”} Multiple values can be entered as comma-separated values. Example: {“fr-fr”,“Add Ons”,“Add”,“Ons”,“Add-ons”,“Add-ons for pizza”} |
In arrays, double quotes (“ ”) are used only for character (string) values. Numeric values are not enclosed with double quotes.
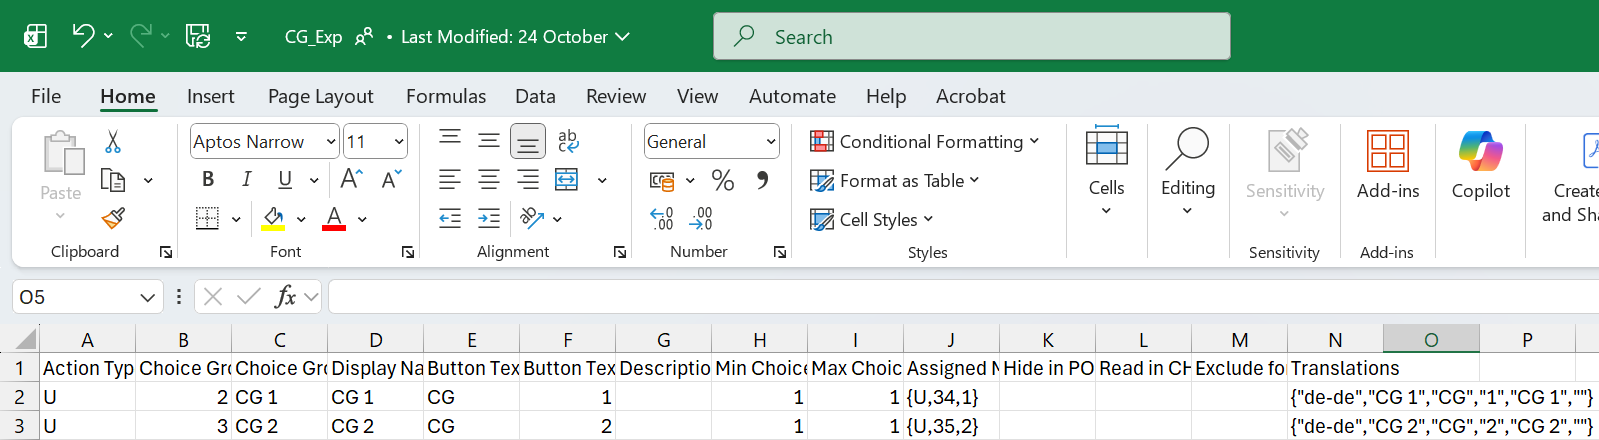
Sample Choice Group Export
Choice Group Import
The choice group Import is used to import choice group records to the Choice Group menu in IGCM using a .csv file. The name of the file is CG_Imp and placed in the following location: <Drive>\InfoGenesis\itenant_id\enterprise_id\Division_id\Store_id.
Parent enterprise users can import choice group data to base and group records based on the selection in the CCM2 Group drop-down list (Reports ➜ Scheduling ➜ Task Setup ➜ Choice Group Import csv).
It is recommended to first export the .csv file and then perform import by modifying the exported file.
The following table provides information on the import specifications:
|
Sequence |
Field Name |
Valid Data |
Format |
Required |
Description |
|---|---|---|---|---|---|
|
1 |
Action |
U or D |
Text |
Yes |
|
|
2 |
Choice Group ID |
1-99,999 |
Numeric |
Optional |
The choice group ID. |
|
3 |
Choice Group Name |
1-16 characters |
Text |
Yes |
The choice group name. |
|
4 |
Display Name |
500 characters |
Text |
Optional |
The choice group display name. |
|
5 |
Button Text 1 |
1-7 characters |
Text |
Optional |
The button text 1. |
|
6 |
Button Text 2 |
0-7 characters |
Text |
Optional |
The button text 2. |
|
7 |
Description |
0-1000 characters |
Text |
Optional |
The description of the choice group. |
|
8 |
Min Choices |
0-255 |
Numeric |
Optional |
The minimum number of modifiers to add the choice group. |
|
9 |
Max Choices |
1-255 |
Numeric |
Optional |
The maximum number of modifiers to add the choice group. |
|
10 |
Modifiers |
Modifier ID: 1-999,999,999 |
Numeric |
Optional |
Array indicating the modifiers in the following format: {action,modifier ID,sequence} Multiple values can be entered as comma-separated values. Example: {U,22,1},{U,33,2} |
|
12 |
Hide in POS |
0 or 1 |
Numeric |
Optional |
|
|
13 |
Read Only in Child Enterprise |
0 or 1 |
Numeric |
Optional |
|
|
14 |
Exclude for Child Enterprise |
0 or 1 |
Numeric |
Optional |
|
|
15 |
Translation |
|
Text |
Optional |
Array indicating translations for the choice group record in the following format: {“language ISO code”, “choice group name”,“button text 1”,“button text 2”,“display name”, “description”} Multiple values can be entered as comma-separated values. Example: {“fr-fr”,“Add Ons”,“Add”,“Ons”,“Add-ons”,“Add-ons for pizza”} |
In arrays, double quotes (“ ”) are used only for character (string) values. Numeric values are not enclosed with double quotes.
Important Points
-
To update a specific field for the choice group, users can enter the value against the appropriate field in the .csv file and perform an import. The existing values of other fields are retained.
-
The action type, D, must be used within arrays to remove the mapping of those values in an appropriate record. For example, to remove the modifier (ID - 5) associated with a choice group record, the value in the Modifier field must be modified as {D,5,1}.
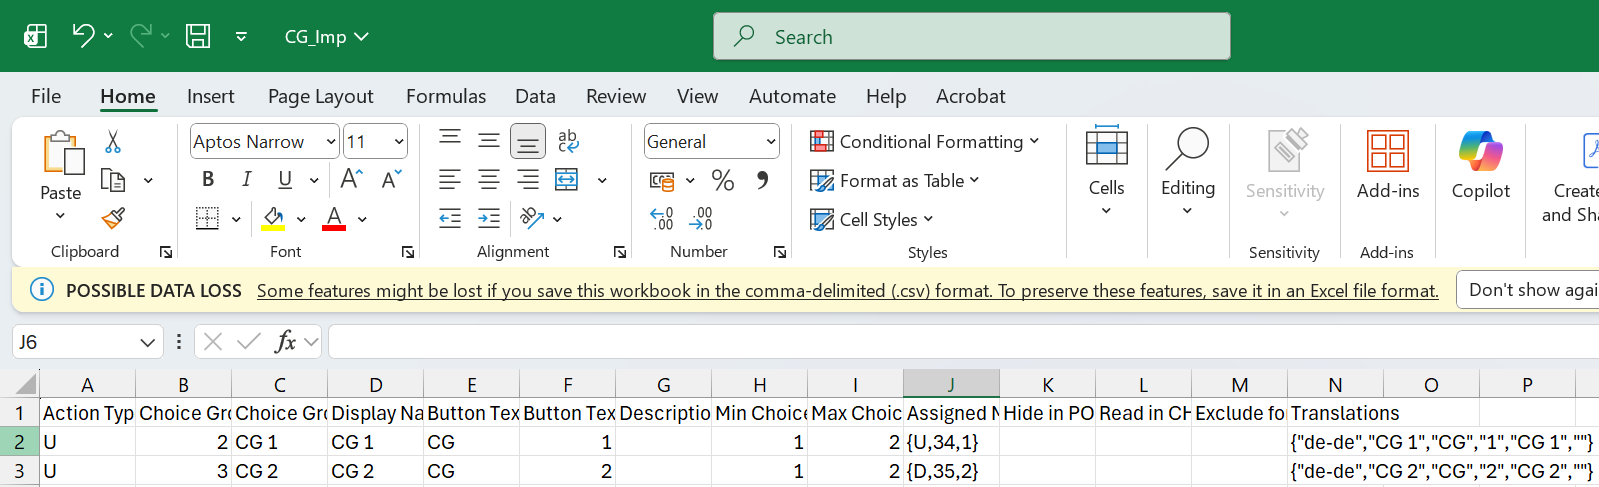
Sample Choice Group Import
Employee
Employee Export
The Employee Export is used to export employee data from IGCM into a .csv file. The name of the file is Emp_Exp and exported to the following location: <Drive>\InfoGenesis\etenant_id\enterprise_id\Division_id\Store_id.
Parent enterprise users can export base and group employee records based on the selection in the CCM2 Group drop-down list (Reports ➜ Scheduling ➜ Task Setup ➜ Employee Export csv).
The following table provides information on the export specifications:
|
Sequence |
Field Name |
Valid Data |
Format |
Description |
|---|---|---|---|---|
|
1 |
Action |
U |
Text |
U - To add a new modifier or update fields in an existing modifier. |
|
2 |
Employee ID |
1-999,999,999 |
Numeric |
The employee ID. |
|
3 |
Employee First Name |
1-16 characters |
Text |
The employee’s first name. |
|
4 |
Employee Last Name |
1-16 characters |
Numeric |
The employee’s last name. |
|
5 |
Employee POS Name |
1-16 characters |
Numeric |
The employee’s POS name. |
|
6 |
Password |
0-9999 |
Numeric |
The password to log on to the terminal. |
|
7 |
Passcode |
0-9999 |
Numeric |
The passcode to log on to IG Kiosk. |
|
8 |
Card Number |
1-32 |
Numeric/Text |
The employee card number. |
|
9 |
Supervisor Employee ID |
1-999,999,999 |
Numeric |
The employee ID of the supervisor. |
|
10 |
Product ID |
1-999,999 |
Numeric |
The product ID. |
|
11 |
Default for Order API |
0 or 1 |
Numeric |
|
|
12 |
Scheduled |
0 or 1 |
Numeric |
|
|
13 |
Job Codes |
|
Numeric/Text |
Array indicating job code in the following format: {job code,offline default,add date, estimated labor rate, manger’s approval,assignment ID} Multiple values can be entered as comma-separated values. Example: {U,58,1,20240715,0.00,0,""} |
|
14 |
Street 1 |
0-50 characters |
Text |
The employee’s address line 1. |
|
15 |
Street 2 |
0-50 characters |
Text |
The employee’s address line 2. |
|
16 |
City |
0-50 characters |
Text |
The employee’s city. |
|
17 |
State |
0-50 characters |
Text |
The employee’s state. |
|
18 |
Postal Code |
0-16 |
Numeric |
The employee’s postal code. |
|
19 |
Country/Region |
0-50 characters |
Text |
The employee’s country. |
|
20 |
Home Telephone Number |
0-16 |
Numeric |
The employee’s home telephone number. |
|
21 |
Contact Telephone Number |
0-16 |
Numeric |
The employee’s contact telephone number. |
|
22 |
Birth Date |
Date in the following format: YYYYMMDD |
Date |
The employee’s birth date. |
|
23 |
Hire Date |
Date in the following format: YYYYMMDD |
Date |
The employee’s hire date. |
|
24 |
Termination Date |
Date in the following format: YYYYMMDD |
Date |
The employee’s termination date. |
|
25 |
Last Review Date |
Date in the following format: YYYYMMDD |
Date |
The employee’s last review date. |
|
26 |
Next Review Date |
Date in the following format: YYYYMMDD |
Date |
The employee’s next review date. |
|
27 |
|
0-50 characters |
Text |
The employee’s email ID. |
|
28 |
Other |
0-11 characters |
Text |
The employee’s other information. |
|
29 |
Secondary ID |
1-999,999,999 |
Numeric |
The employee’s secondary ID. |
|
30 |
Terminal Default Language |
Language ISO Code: 5 characters |
Text |
The default terminal language. |
|
31 |
Keypad Location |
0 or 1 |
Numeric |
|
|
32 |
Translation |
|
Text |
Array indicating translations for the employee record in the following format: {“language ISO code”, “employee first name”,“ employee last name”,“ employee POS name”} Multiple values can be entered as comma-separated values. Example: {“fr-fr”,“Chris”,“Adams”,“ChrisA”} |
In arrays, double quotes (“ ”) are used only for character (string) values and numeric values are not enclosed with double quotes.
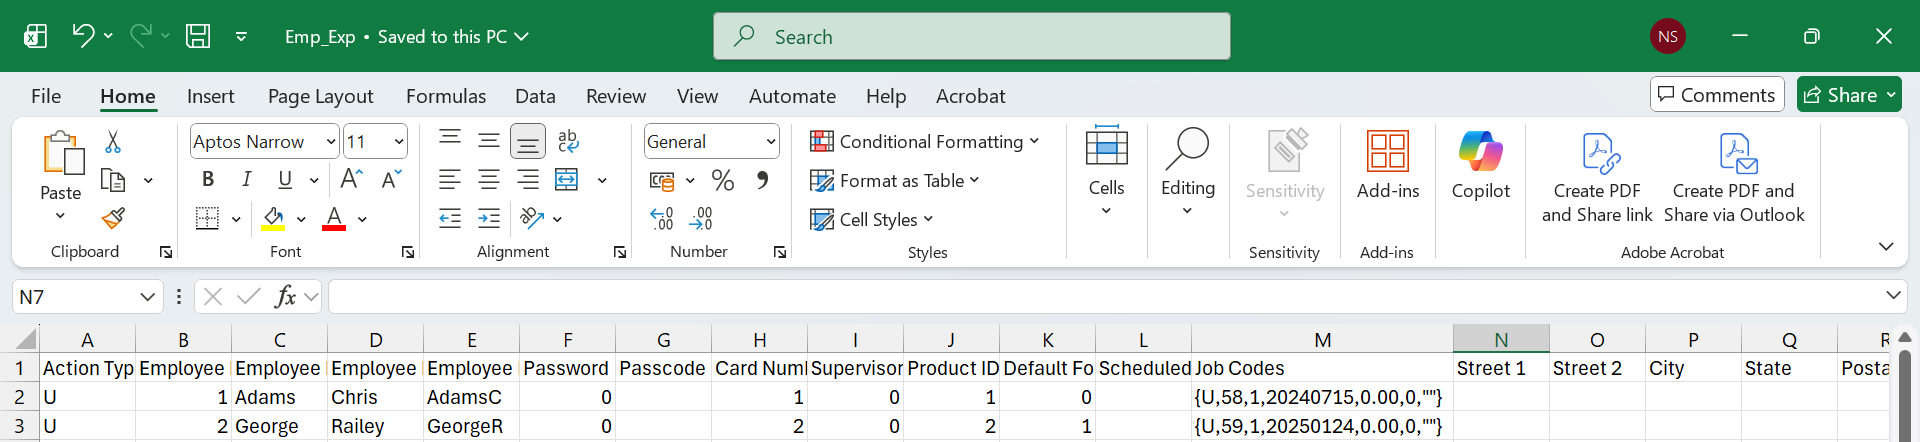
Sample Employee Export
Employee Import
The Employee Import is used to import employee data to the Employee menu in IGCM using a .csv file. The name of the file is Emp_Imp and placed in the following location: <Drive>\InfoGenesis\itenant_id\enterprise_id\Division_id\Store_id.
Parent enterprise users can import employee data to base and group records based on the selection in the CCM2 Group drop-down list (Reports ➜ Scheduling ➜ Task Setup ➜ Employee Import csv).
It is recommended to first export the .csv file and then perform import by modifying the exported file.
The following table provides information on the import specifications:
|
Sequence |
Field Name |
Valid Data |
Format |
Required |
Description |
|---|---|---|---|---|---|
|
1 |
Action |
U |
Text |
Yes |
|
|
2 |
Employee ID |
1-999,999,999 |
Numeric |
Yes |
The employee ID. |
|
3 |
Employee First Name |
1-16 characters |
Text |
Optional |
The employee’s first name. |
|
4 |
Employee Last Name |
1-16 characters |
Numeric |
Optional |
The employee’s last name. |
|
5 |
Employee POS Name |
1-16 characters |
Numeric |
Optional |
The employee’s POS name. |
|
6 |
Password |
0-9999 |
Numeric |
Optional |
The password to log on to the terminal. |
|
7 |
Passcode |
0-9999 |
Numeric |
Optional |
The passcode to log on to IG Kiosk. |
|
8 |
Card Number |
1-32 |
Numeric/Text |
Optional |
The employee card number. |
|
9 |
Supervisor Employee ID |
1-999,999,999 |
Numeric |
Optional |
The employee ID of the supervisor. |
|
10 |
Product ID |
1-999,999 |
Numeric |
Optional |
The product ID. |
|
11 |
Default for Order API |
0 or 1 |
Numeric |
Optional |
|
|
12 |
Scheduled |
0 or 1 |
Numeric |
Optional |
|
|
13 |
Job Codes |
|
Numeric/Text |
Optional |
Array indicating job code in the following format: {job code,offline default,add date, estimated labor rate, manger’s approval,assignment ID} Multiple values can be entered as comma-separated values. Example: {U,58,1,20240715,0.00,0,""} |
|
14 |
Street 1 |
0-50 characters |
Text |
Optional |
The employee’s address line 1. |
|
15 |
Street 2 |
0-50 characters |
Text |
Optional |
The employee’s address line 2. |
|
16 |
City |
0-50 characters |
Text |
Optional |
The employee’s city. |
|
17 |
State |
0-50 characters |
Text |
Optional |
The employee’s state. |
|
18 |
Postal Code |
0-16 |
Numeric |
Optional |
The employee’s postal code. |
|
19 |
Country/Region |
0-50 characters |
Text |
Optional |
The employee’s country. |
|
20 |
Home Telephone Number |
0-16 |
Numeric |
Optional |
The employee’s home telephone number. |
|
21 |
Contact Telephone Number |
0-16 |
Numeric |
Optional |
The employee’s contact telephone number. |
|
22 |
Birth Date |
Date in the following format: YYYYMMDD |
Date |
Optional |
The employee’s birth date. |
|
23 |
Hire Date |
Date in the following format: YYYYMMDD |
Date |
Optional |
The employee’s hire date. |
|
24 |
Termination Date |
Date in the following format: YYYYMMDD |
Date |
Optional |
The employee’s termination date. |
|
25 |
Last Review Date |
Date in the following format: YYYYMMDD |
Date |
Optional |
The employee’s last review date. |
|
26 |
Next Review Date |
Date in the following format: YYYYMMDD |
Date |
Optional |
The employee’s next review date. |
|
27 |
|
0-50 characters |
Text |
Optional |
The employee’s email ID. |
|
28 |
Other |
0-11 characters |
Text |
Optional |
The employee’s other information. |
|
29 |
Secondary ID |
1-999,999,999 |
Numeric |
Optional |
The employee’s secondary ID. |
|
30 |
Terminal Default Language |
Language ISO Code: 5 characters |
Text |
Optional |
The default terminal language. |
|
31 |
Keypad Location |
0 or 1 |
Numeric |
Optional |
|
|
32 |
Translation |
|
Text |
Optional |
Array indicating translations for the employee record in the following format: {“language ISO code”, “employee first name”,“ employee last name”,“ employee POS name”} Multiple values can be entered as comma-separated values. Example: {“fr-fr”,“Chris”,“Adams”,“ChrisA”} |
In arrays, double quotes (“ ”) are used only for character (string) values and numeric values are not enclosed with double quotes.
Important Points
-
To update a specific field for the employee record, users can enter the value against the appropriate field in the .csv file and perform an import. The existing values of other fields are retained.
-
The action type, D, must be used within arrays to remove the mapping of those values in an appropriate record. For example, to remove the job code associated with an employee record, the value in the Job Code field must be modified as {D,58,1,20240715,0.00,0,""}.
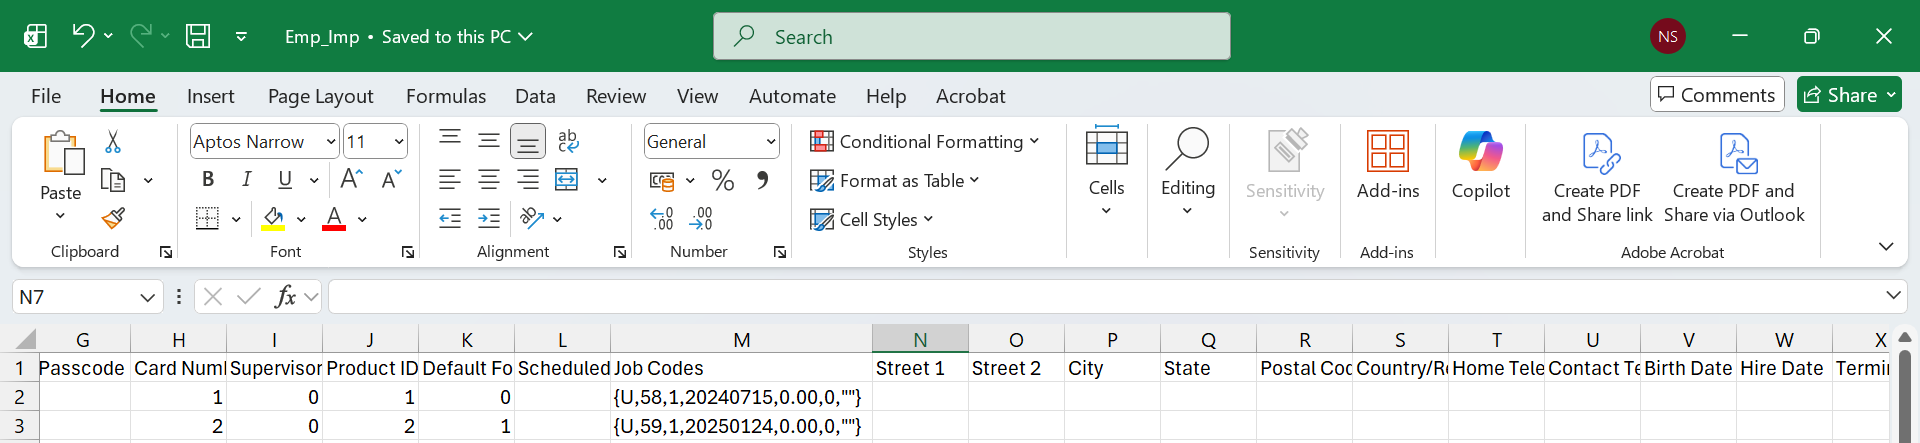
Sample Employee Import