12.3.16
Global Menu
IG OnDemand has been enhanced with Global Menu, a centralized menu management feature that automatically populates menu categories and subcategories based on configurable item attributes.
This enhancement eliminates the need for manual item assignment, ensures new items are automatically included in relevant menus, and reduces the risk of menu maintenance errors.
With this enhancement, users can perform the following functionality:
-
Migrate existing menus to the global menu at store level
-
Automatically add or remove items based on configured query criteria, or add items manually
-
Switch between supported languages directly within the global menu
-
Map global menu to DayPart Schedules and Menu Schedules
-
Inherit and override configurations across division and store levels
-
Control category and subcategory visibility using display filters to allow users to view only relevant items and maintain a clutter-free screen
The Global Menu functionality cannot be disabled once enabled.
Important Points
-
This functionality is available only to users with access to enterprise and menu configurations.
-
Audit logging is supported.
-
Enterprise import and export are not supported.
Changes Made in IGCM
To support this, the following changes have been made in IGCM:
-
A new checkbox, Enable Global Menu, has been added under the Menu Management submenu in the Enterprise menu (Kiosk/OnDemand Configuration ➜ Administration ➜ Enterprise)
-
When enabled,
-
Global menus can be created, and the existing menus in the Menus menu are migrated and managed through the global menu.
-
The Menus menu will be permanently hidden.
-
The option, None, will not be displayed in the Blueprint Action Button drop-down list under the Basic Details submenu in the Queryable Container menu.
-
When Super Screen is selected as the Category Type in the Screen menu, the following options are not displayed in the Screen Type drop-down list.
-
Menu Screen
-
Category/Subcategory.
-
-
-
When disabled, menus can be created and managed through existing menu functionality. This checkbox is disabled by default.
-
-
A new menu, Global Menu, has been added to the Items module (Kiosk/OnDemand Configuration ➜ Items ➜ Global Menu).
-
The checkbox, External Menu Management, has been renamed to Enable External Menu (Kiosk/OnDemand Configuration ➜ Administration ➜ Enterprise ➜ Menu Management). When this checkbox is enabled along with the Enable Global Menu checkbox, menus inherited from the external menu are also displayed with the Global Menu.
-
A new permission, Global Menu, has been added to the Permissions submenu of the Permission Group and Permission Level menus.
Capabilities in Global Menu
Refer to the following table for the capabilities supported in Global Menu:
|
Field |
Description |
|---|---|
|
Migrate existing menus to the global menu |
Existing menus can be migrated to the global menu by selecting the Enable Global Menu checkbox in the Enterprise menu. |
|
Create global menu |
Users can create new global menus at both division and store levels, in addition to the menus migrated from the existing menus. See the Configurations in IGCM section for more information. |
|
Manage Division and Store Level Configurations |
Properties can maintain a shared menu at the division level, while individual stores can create store-specific categories or items without affecting the division-level menus. Division Level If the global menu is accessed at the division level, the following actions can be performed:
The following actions cannot be performed:
If the global menu is accessed at the store level, the following actions can be performed:
The following actions cannot be performed:
|
|
Hide/Unhide Menu Entities in OnDemand |
|
|
Exclude Items and Packages |
Users can exclude specific items or packages from the entire menu in the OnDemand site. For example, if Burger is selected here, it will be removed from the menu. Also, when adding items to the menu, category, or subcategory, Burger will not be displayed. |
|
Display Choice Group and Modifiers |
Users can display the choice groups and modifiers associated with non-query-based items only. Choice groups and modifiers are not displayed for query-based items in IGCM. Refer to the Display Choice Group and Modifiers section for more information. |
|
Switch between supported languages |
Users can view the translated menu, category, and subcategory names without navigating to the Enterprise menu.
|
|
Cart Validation |
The ability to add hidden items to the cart is handled by Terminal Option 1504 (Override Cart Validation to allow hidden items).
|
|
Manage Menu Entities |
Users can manage menu entities by modifying, moving, rearranging, and deleting categories, subcategories, and items within a global menu. Modify Category or Subcategory
|
Indicators and Icons
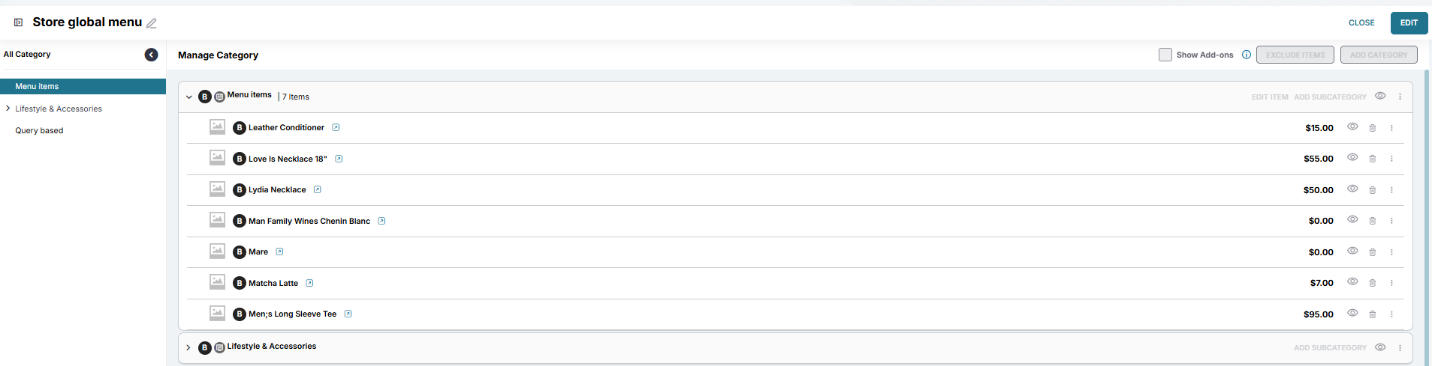
Users can identify the inheritance status of menus, categories, subcategories, and items using the available indicators, and identify store-level items using the available icons.
Sample Screen
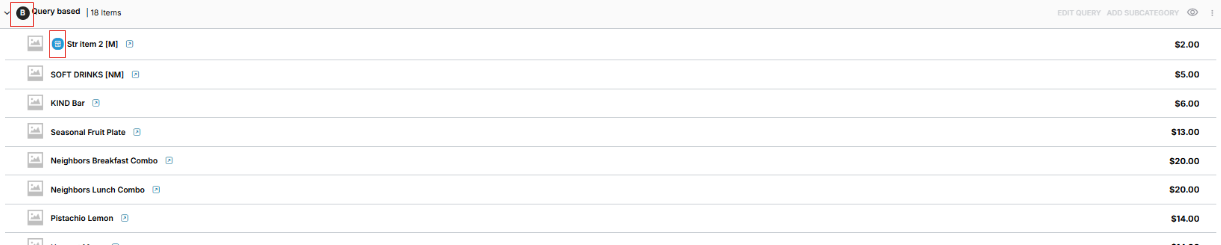
Refer to the following tables for icons and indicators displayed:
|
Indicator/Icon |
Description |
|---|---|
|
Indicator |
|
|
Base (B) |
The B indicator is displayed for categories, subcategories, items, and menus created at the division or store level, including existing menus from Menus menu, and division-level records copied to the store level. |
|
Inherited (I) |
The I indicator is displayed for categories, subcategories, items, and menus inherited from the division level. Note - A division-level menu indicated with the I indicator cannot be deleted. When the menu is overridden at the store level, the Delete option becomes available. Selecting Delete removes only the store-level changes and retains the inherited menu in the store. |
|
Store Override (SO) |
The SO indicator is displayed in the following scenarios:
Note - When an item is manually added to or removed from a division menu at the store level, the SO indicator is not displayed. |
|
Icon |
|
|
View Store Item Icon |
Users can identify store-level items through indicators displayed in item selection screens, search results, and configured menu views. Indicators remain visible for existing records, copied menu records, and store items within packages in the global menu. |
When an inherited configuration is modified, the message, You are overriding the inherited configuration. Changes made here will apply only at the current level and will no longer inherit updates from the Parent level is displayed.
After a modification is made to an inherited record, the message The inherited configuration has been overridden is displayed.
IGCM Configuration Sequence
Refer to the following table for the installation sequence that must be followed to configure the functionality:
|
Sequence |
Functionality |
Comments |
|---|---|---|
|
1 |
Enable Global Menu |
Enable the Enable Global Menu checkbox. This checkbox cannot be disabled once enabled. |
|
2 |
Configure Permission Level and Permission Group |
For users other than SaaS Operations I and the POS All Permissions and System POS All Permission groups, the required permissions must be enabled manually. |
|
3 |
Create Global Menu |
Create a Global Menu to organize and manage categories, subcategories, items, and packages across division and store levels. |
|
4 |
Edit Global Menu |
Modify the configuration of an existing Global Menu, including menu details, categories, subcategories, items, and related settings. |
|
5 |
Add category to Global Menu |
Add a category to the global menu before saving it. Note - A maximum of 50 categories can be created within a global menu. |
|
6 |
Add items to category |
Add items to a category after creating categories. The Add Items button is displayed only when Enable Dynamic Query Based Add checkbox in the Add Category prompt is disabled. Note - A maximum of 500 items can be added to a category. |
|
7 |
Add subcategory within category |
Add a subcategory within category to create second level grouping under a main menu category. When the first subcategory is created under a category, existing items and the configured item addition method (Query-Based Add or manual item addition) are moved to it. For additional subcategories, users can select the item addition method. Note - A maximum of 50 subcategories can be created under a category. |
|
8 |
Add items to subcategory |
Add items to the subcategory. The Add Items button is displayed only when Enable Dynamic Query Based Add checkbox in the Add SubCategory prompt is disabled. Note - A maximum of 500 items can be added to a subcategory. |
|
9 |
Configure Dynamic Query Based Item Population |
Items are auto populated within categories or subcategories based on the configured query criteria. The following options are available to refine the item population:
For example, if a query is configured for the Beverage item group, matching items such as Coffee and Tea are added automatically. Note - If more than 500 records satisfy the configured criteria, only the first 500 records based on the selected sorting order are displayed. |
|
10 |
Save Global Menu Changes |
Save the configured Global Menu for the selected division or store |
|
11 |
Map Global Menu to DayPart Schedule |
Map the configured menu to a daypart schedule. |
|
12 |
Map Global Menu to Menu Schedule. |
Map the configured menu to the Menu Schedule, alternative to the daypart schedule. |
Configurations in IGCM
Enable Global Menu
Navigate to Kiosk/OnDemand Configuration ➜ Administration ➜ Enterprise.
Select the preferred record from the screen and select Edit to modify it.
Navigate to the Menu Management submenu.
Enable the Enable Global Menu checkbox. This checkbox cannot be disabled once enabled.
Select Save.
Configure Permission Level
Navigate to User Management ➜ Administration ➜ Permission Level.
For Customer IV, Field Installer III, and Technical Support II
Select Edit.
Navigate to the Permissions submenu.
Enable the Global Menu: Main permission. This checkbox is enabled by default for SaaS Operations I.
Select Save.
Configure Permission Group
Navigate to User Management ➜ Administration ➜ Permission Group.
For POS All Permissions and System POS All Permission the following permissions are enabled by default:
|
Menu |
Add |
Edit |
Delete |
View |
|---|---|---|---|---|
|
Global Menu: Main |
Enabled |
Enabled |
Enabled |
Enabled |
Create Global Menu
The image displayed for an item in the Global Menu is based on the image configured for that item in the Item menu.
Select the preferred division/store context from the screen.
Navigate to Kiosk/OnDemand Configuration ➜ Items ➜ Global Menu.
Select Add to create a new record.
Refer to the following table and fill in the fields:
|
Field |
Description |
|---|---|
|
Menu Details |
|
|
Menu Name |
Enter a preferred name for the global menu. |
|
Employee Facing |
Not applicable to OnDemand. |
|
Guest Facing |
Enable this checkbox. Note - This checkbox cannot be disabled once enabled. |
|
Show view menu popup |
|
|
Guest Display Name |
Enter the display name to be displayed to the guests. The global menu name is auto populated by default. Maximum characters: 100 |
|
Header Text |
Enter the header text. Maximum characters: 100 |
|
Instruction text |
Enter the instruction text. Maximum characters: 100 |
|
Background Image |
Not supported for OnDemand. |
|
Image |
Not supported for OnDemand. |
|
Desktop Background |
|
|
Select Your Preference |
Select any of the following options:
|
|
Background color |
Select the preferred background color from the color picker. Default: #EAF8C7FF Note - This field is displayed only when Color is selected. |
|
Background image |
Select Add Image to upload a background image. Note - This option is displayed only when Image is selected. |
|
Tablet/Mobile Background |
|
|
Select Your Preference |
Select any of the following options:
|
|
Background color |
Select the preferred background color from the color picker. Default: #EAF8C7FF (Light green) Note - This field is displayed only when Color is selected. |
|
Background Image |
Select Add Image to upload a background image. Note - This option is displayed only when Image is selected. |
|
Translation |
|
|
Guest Display Name |
Enter the translated text in the configured language or select the AI Translation (Beta) button to generate the translation automatically. |
|
Menu Name |
Enter the translated text in the configured language or select the AI Translation (Beta) button to generate the translation automatically. |
|
Header Text |
Enter the translated text in the configured language or select the AI Translation (Beta) button to generate the translation automatically. |
|
Instruction Text |
Enter the translated text in the configured language or select the AI Translation (Beta) button to generate the translation automatically. |
Select Add Item. The Manage Category screen is displayed.
Edit Global Menu
When inherited global menu details are modified at the store level, the global menu record is identified with the SO indicator. Only the modified global menu details stop inheriting subsequent parent-level updates.
Perform the following steps to edit the configured global menu.
Select the Edit icon. The Edit Global Menu prompt is displayed.
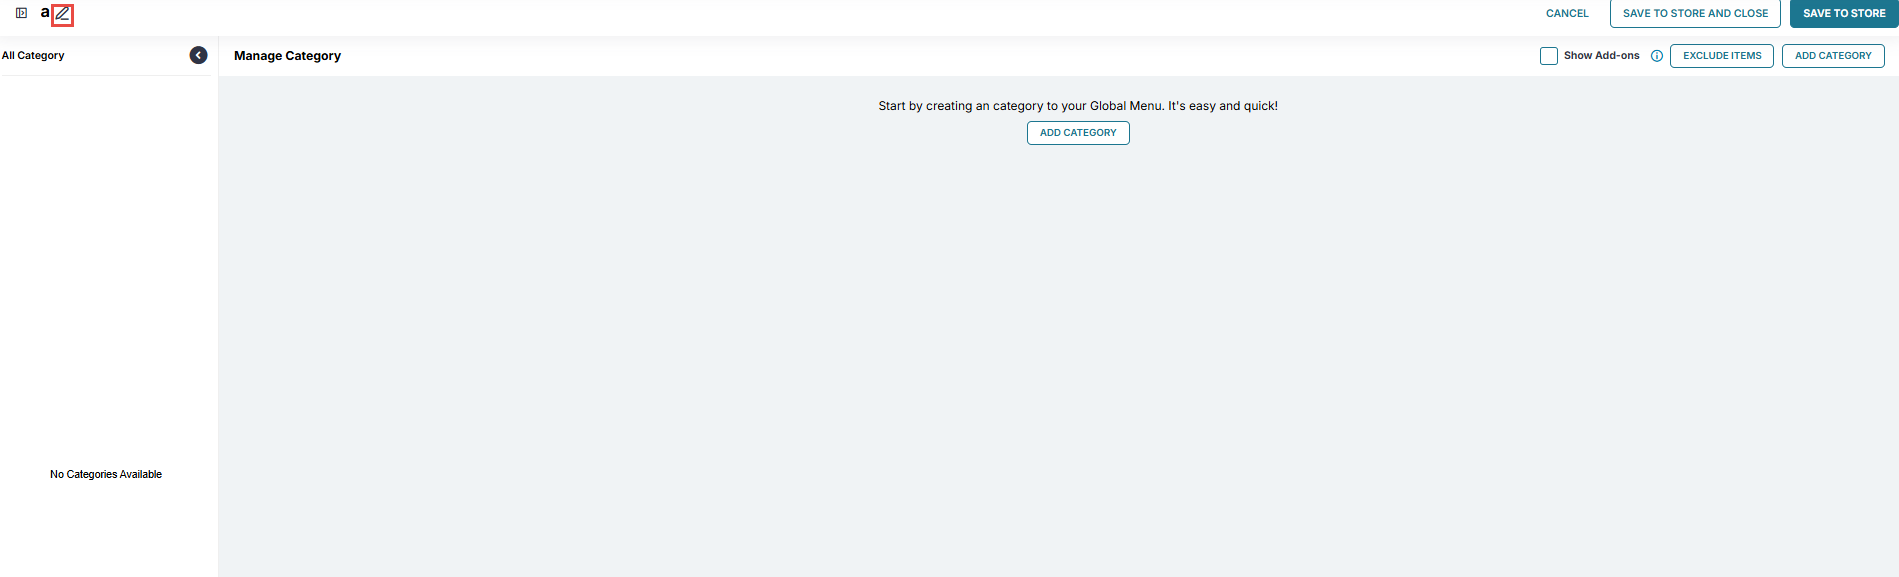
Modify the required values.
Select Save.
When users switch between menu records using the Data Toggle icon, a confirmation prompt with a message, You have unsaved changes which will be lost if you navigate away. Are you sure you want to leave the page and discard these changes?, is displayed.
When users select the Edit Next option, changes made to the current menu are saved automatically, and the next menu is opened.
Add Category to Global Menu
Select Add Category. The Add Category prompt is displayed.
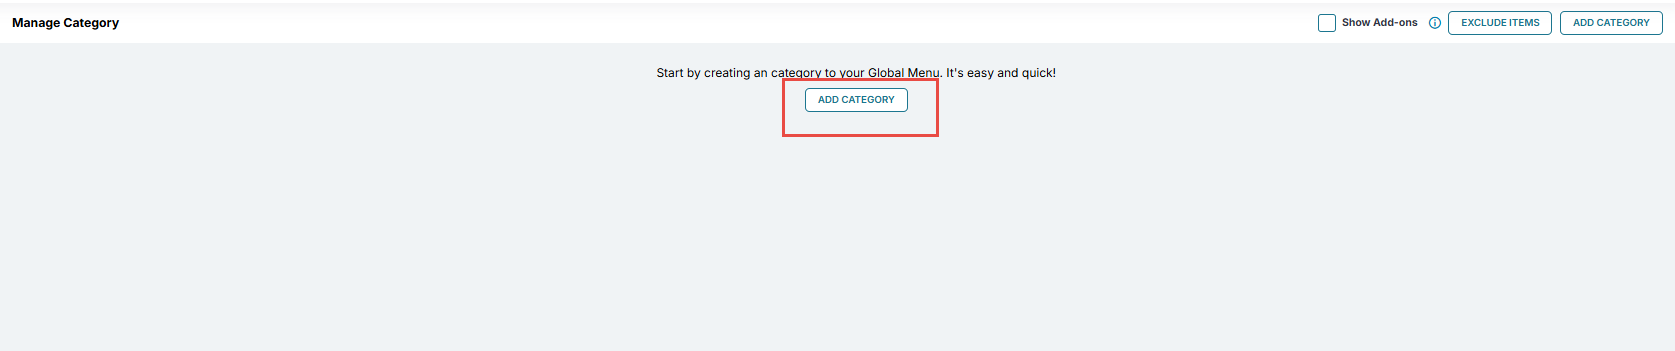
Refer to the following table and fill in the fields:
|
Field |
Description |
|---|---|
|
Category Name |
Enter a preferred name for the category. This field cannot be modified after the category is saved. |
|
Description |
Enter the preferred category description. |
|
Display Text |
Enter the display text to be displayed. The category name is auto populated by default. |
|
Display Type |
Select the preferred display type:
|
|
Overlay Color |
Select the preferred color from the color picker. This field is displayed only when Image and Text or Only Text option is selected. |
|
Text Color |
Select the preferred color from the color picker. This field is displayed only when Image and Text or Only Text option is selected. |
|
Image Picker |
Select Add Image to open the Gallery Browser and select Upload File to upload an image for the category. This field is displayed only when Image and Text or Only Image option is selected. |
|
Query Based Add |
|
|
Enable Dynamic Query Based Add |
Note - This checkbox cannot be modified after the category or subcategory is saved. |
|
Menu Entity Button Color Configuration - This section is not supported for OnDemand |
|
|
Translation |
|
|
Name |
Enter the translated text in the configured language or select the AI Translation (Beta) button to generate the translation automatically. |
|
Description |
Enter the translated text in the configured language or select the AI Translation (Beta) button to generate the translation automatically. |
|
Display Text |
Enter the translated text in the configured language or select the AI Translation (Beta) button to generate the translation automatically. |
Select Save.
To add additional categories, select Add Category from the screen.

Add Items to Category
Perform the following steps to add items manually:
Select Add Items. The Add Items prompt is displayed.
Select the preferred items and packages to be added.
Select Add Items. The items appear on the right side.
Select Done.
Refer to the Configure Query Based Item Population section for information about automatic item population.
Add Subcategory within Category
Select Add Subcategory. The Add Subcategory prompt is displayed.
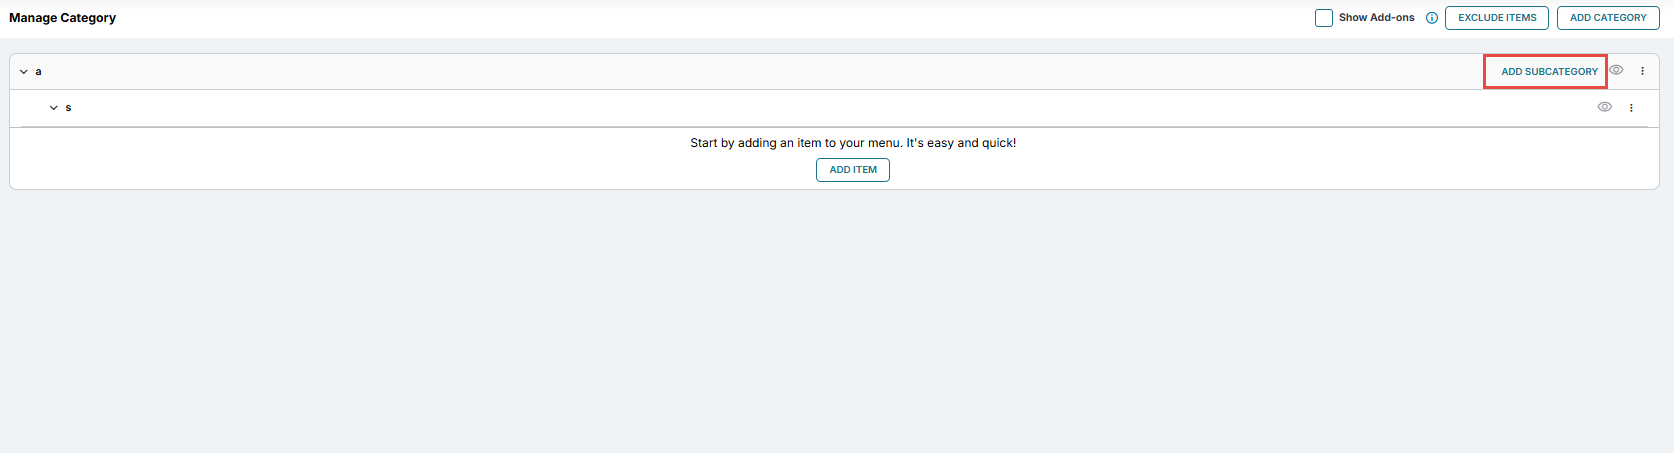
Refer to the following table and fill in the fields:
|
Field |
Description |
|---|---|
|
Category Name |
Enter a preferred name for the subcategory. Note - This field cannot be modified after the subcategory is saved. |
|
Description |
Enter the preferred subcategory description. |
|
Display Text |
Enter the display text to be displayed. The subcategory name is auto populated by default. |
|
Display Type |
Select the preferred display type:
|
|
Overlay Color |
Select the preferred color from the color picker. Default: #000000 Note - This field is displayed only when Image and Text or Only Text option is selected. |
|
Text Color |
Select the preferred color from the color picker. Default: #FFFFFFFF Note - This field is displayed only when Image and Text or Only Text option is selected. |
|
Image Picker |
Select Add Image to open the Gallery Browser and select Upload File to upload an image for the subcategory. Note - This field is displayed only when Image and Text or Only Image option is selected. |
|
Query Based Add |
|
|
Enable Dynamic Query Based Add |
This checkbox inherits the enabled or disabled state from the parent category for the first subcategory when items or a query configuration exists within the category. For subsequent subcategories, users can select the required state independently. |
|
Menu Entity Button Color Configuration - This section is not supported for OnDemand |
|
|
Translation |
|
|
Name |
Enter the translated text in the configured language or select the AI Translation (Beta) button to generate the translation automatically. |
|
Description |
Enter the translated text in the configured language or select the AI Translation (Beta) button to generate the translation automatically. |
|
Display Text |
Enter the translated text in the configured language or select the AI Translation (Beta) button to generate the translation automatically. |
Select Save.
Add Items to Subcategory
Perform the following steps to add items manually:
Select Add Items. The Add Items prompt is displayed.
Select the preferred items and packages to be added.
Select Add Items. The items appear on the right side.
Select Done.
Refer to the Configure Query Based Item Population section for information about automatic item population.
Configure Dynamic Query Based Item Population
Item images are not displayed in IGCM for items populated through query but are displayed on the OnDemand site.
Duplicate queries with the same criteria cannot be configured.
Perform the following steps to auto populate items in the menu based on the configured query:
Select Add Query. The Query Based Add prompt is displayed. This option is displayed only when Enable Dynamic Query Based Add is enabled.
Refer to the following table and fill in the fields:
|
Field |
Description |
|---|---|
|
Revenue Category |
Select the preferred revenue category. |
|
Item Tags |
Select the preferred item tags. |
|
Product Class |
Select the preferred product class. |
|
Item Group |
Select the preferred item group. |
|
Add Query |
Select to add more queries. |
|
Show Query Result |
Select to view the query result. |
Select Done.
Configure Inclusions
Navigate to Inclusions.
Select Inclusion List.
Add preferred items and packages.
Select Add Items. The selected records appear on the right side.
Select Remove to remove the added records.
Select Done. Items and packages added through Inclusion are displayed with the dynamic query-based results.
Configure Exclusions
Navigate to Exclusions.
Select Exclusion List.
Add preferred items and packages.
Select Exclude. The excluded records appear on the right side.
Select Remove to remove the added records from the exclusion list.
Select Done. Items and packages added to the exclusion list are not displayed in the dynamic query results.
View Query Results
If the same record appears in both Query Results and Inclusions, it is displayed only once in the menu.
Select the View Query Results option. The Query Result prompt is displayed.
Refer to the following table and fill in the fields:
|
Field |
Description |
|---|---|
|
Display Options |
|
|
Sort Using |
Select any of the following options:
ID is selected by default. |
|
Sort By |
Select any of the following options:
By default, records are sorted in ascending order. |
Select Sort.
Select Done. Items that satisfy the configured Query, Inclusion, and Exclusion rules are displayed based on the selected sort options.
Save Global Menu Changes
Refer to the following table and select one of the following options:
|
Field |
Description |
|---|---|
|
Save to Store |
Saves the global menu configuration for the selected store. This option is displayed only at store level. |
|
Save to Store & Close |
Saves the global menu configuration for the selected store and closes the screen. This option is displayed only at store level. |
|
Save & Close |
Saves the global menu configuration for the selected division and closes the screen. This option is displayed only at division level. |
|
Save |
Saves the global menu configuration for the selected division. This option is displayed only at division level. |
Map Configured Menus to Profit Center
For Direct Menu
Navigate to Kiosk/OnDemand Configuration ➜ Administration ➜ Site Entities.
Choose the appropriate record and select Edit.
Navigate to the Profit Centers submenu.
Select Screen from the Go To Screen drop-down list.
Select the configured menu from the Value drop-down list.
Select Save.
Map Global Menu to DayPart Schedule
The configured menu can be mapped to the daypart schedule using the Screen drop-down list in the Guest Facing section (Kiosk/OnDemand Configuration ➜ Business ➜ Daypart Schedule ➜ Schedule Details). When mapped, categories and subcategories are displayed based on the configured display filter conditions.
Once configured, it can be mapped to the terminal group against the appropriate profit center using the Daypart Schedule Name drop-down list (Kiosk/OnDemand Configuration ➜ Terminals ➜ Terminal Group ➜ Daypart Configuration)
Perform the following steps:
Navigate to Kiosk/OnDemand Configuration ➜ Administration ➜ Site Entities.
Choose the appropriate record and select Edit.
Navigate to the Profit Centers submenu.
Select DaypartSchedule from the Go To Screen drop-down list.
Select Save.
Map Global Menu to Menu Schedule
The configured menu can be mapped to the Menu Schedule, a user-friendly alternative to the daypart schedule, by selecting the menu from the Screen drop-down list in the Schedule Details section (Kiosk/ Configuration ➜ Business ➜Menu Schedule ➜Schedule Details). When mapped, categories and subcategories are displayed based on the configured display filter conditions.
Display Filters
Select the Display filters option. The Display Filter prompt is displayed.

Refer to the following table and fill in the fields:
|
Field |
Description |
|---|---|
|
Filter Based on |
|
|
Meal Period |
Enable this checkbox to display the category or subcategory only for the selected meal periods. |
|
Profit Center |
Enable this checkbox to display the category or subcategory only for the selected profit centers. |
|
Concept |
Enable this checkbox to display the category or subcategory only for the selected concepts. |
|
Schedule |
Enable this checkbox to display the category or subcategory only for the configured schedule. |
|
Meal Period |
|
|
Select Meal Period |
Select the preferred checkboxes from the drop-down list.
|
|
Profit Center |
|
|
Select Profit Center |
Select the preferred profit centers from the drop-down list. |
|
Concept |
|
|
Select Concept |
Select the preferred concept from the drop-down list. |
|
Schedule |
|
|
Reference Date |
Select the start date for the schedule. This field allows selection of both past and future dates. Default - Current date is displayed. |
|
Rotation Weeks (Up To 5 Weeks) |
Enter the number of weeks for schedule rotation. |
|
Week |
Select the appropriate week to configure. This drop-down list displays options based on the number of weeks configured in the Rotation Weeks field. Example: If 3 is configured in Rotation Weeks field, the following are the options displayed:
|
Select Add.
Set Display Rule for Profit Center and Terminal Group
Select the Set Display Rule option. The Display Rules prompt is displayed.
Select Add to add a new rule.
Refer to the following table and fill in the fields:
|
Field |
Description |
|---|---|
|
Profit Center |
Select the preferred profit center from the drop-down list. |
|
Terminal Group |
Select the preferred terminal groups from the drop-down list. |
Select Add.
Display Choice Groups and Modifiers
Enable the Show Addons checkbox.
-
When enabled, the choice groups and modifiers are displayed within a non-query-based item in the menu.
-
If the menu is guest facing, only one level of nested modifiers will be displayed.
-
If the menu is employee facing, all configured levels of nested modifiers will be displayed.
-
If the menu is both guest and employee facing, all levels of nested modifiers will be displayed with the following prompt: Only the first level of nested modifiers is applicable for Guest-facing applications.
-
If the menu was first configured as guest facing and later modified to employee facing, all levels of nested modifiers will be displayed with the following prompt:
Only the first level of nested modifiers is applicable for Guest-facing applications.
-
-
When disabled, IGCM does not display choice groups and modifiers within the item. By default, this checkbox is disabled.
Exclude Items and Packages
Select Exclude Items. The Exclude Items prompt is displayed.
Select the Items or Packages flag and select preferred items or packages to be excluded.
Select Add Items.
Select Done. The selected items or packages will be excluded from the menu.
Sample Menu