


Ordering Items By Course
A course is any set of food items that are served together. Items can be organized and ordered by course. Courses are significant in a restaurant since ordering by course permits more control over the timing of food delivery to the guest.
Advance Course
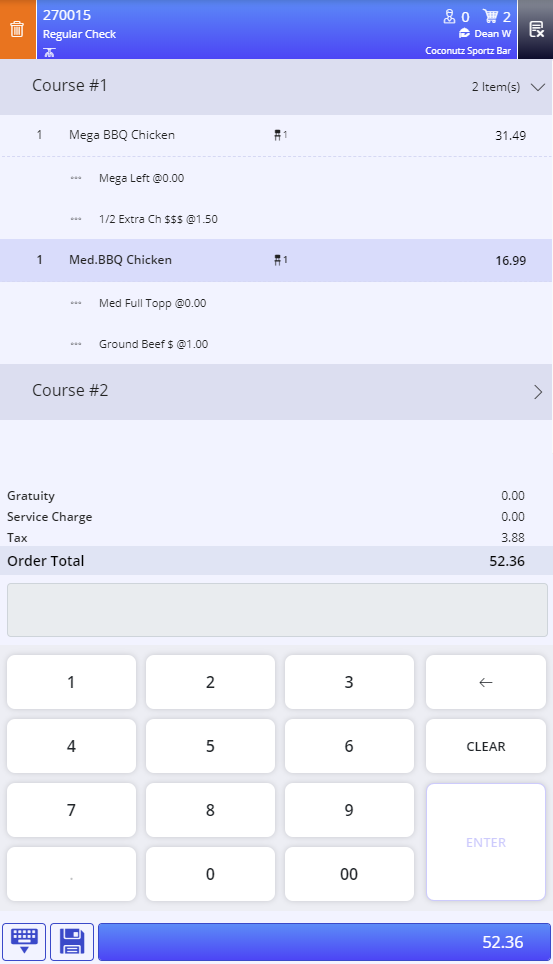
The Advance Course function is used to group the items in a check into different courses and displays the course number. The course number is displayed in the check only after Advance Course function is selected. By default, Course 1 is added in the check. For example, if there are items that are already available in the check and the Advance Course function is selected for the first time, the items in the check are added under Course 1. Any new items that are added after that are assigned to Course 2.
Create a check and add items.
Navigate to Jump Bar ➜ Function Screen. The Function Screen appears.
Select Advance Course. The items in the check are assigned to Course #1, simultaneously next course number is created in the check for the items that are going to be added in the future.
Important Points
-
The Advance Course function can be performed only on an open check.
-
If there are no items in the check when the Advance Course function is selected, Course 1 is skipped and any items that are added after this are automatically assigned to Course #2.
-
The user can add a maximum of 25 courses in a check.
-
A message Max Course Number Exceeded appears if the user tries to add more than 25 courses.
-
A course can be voided only if there are no items assigned to it and there is no need to provide void reason while voiding a course.
-
A message, This course contains item(s) appears if the user tries to void a course with items.
-
A course must be voided sequentially. For example, Course #3 must be voided before voiding Course #2.
-
The user can assign different seats for the items within a course.
-
The user can perform Advance Course even if there are authorizations in the check.
-
If a check with course is fired, the course numbers are also sent to the kitchen printer or kitchen video.
Modify Course
The Modify Course function allows the user to modify the course to which an item is assigned. The available courses in the check are displayed in the Modify Course prompt that appears when this function is selected. The current course of the selected item is highlighted, and the user can choose the appropriate course to assign to the item.
To automatically display the course number to which an item is assigned, users must set the ModifyCourseInput field in the Settings section of the Settings.ini file to True. If ModifyCourseInput field is set to False, users must manually enter the course number is displayed This field is set to False by default.
ModifyCourseInput field is applicable only for 12.x server. For systems working on 4.5.x server, the course must be modified manually.
Select the menu item in the check.
Navigate to Jump Bar ➜ Function Screen. The Function Screen appears.
Select Modify Course. The Modify Course prompt appears.
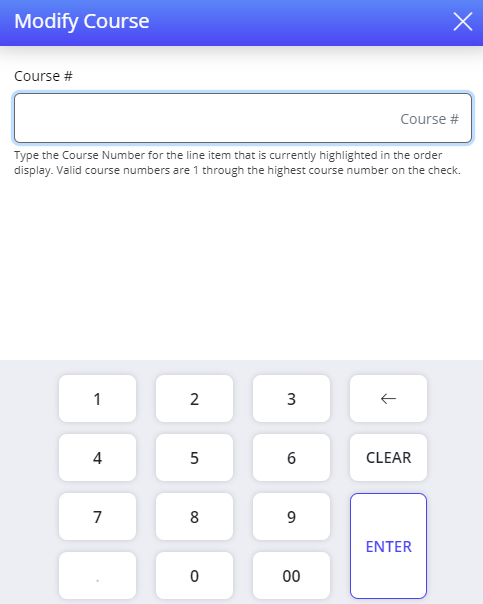
Enter the course number.
Select Enter. The course number of the selected item is modified successfully. Only the course numbers that are already available in the check are considered valid.
Important Points
-
A message, The course number is invalid. Valid course numbers: 1-x, appears if the user tries to enter course number that is not present in the check. Here x represents the number of the last course number available in the check.
-
The Modify Course function can be performed only on an open check.
-
The Modify Course function can be performed only on items, modifiers, special instructions, SKU, and packages.
-
A message Function Not Allowed appears if the user selects the course when the Modify Course function is selected.
-
The user is not allowed to perform Modify Course after a check is partially tendered.
-
The user is not allowed to perform Modify Course after tip is applied to a check.
-
The Modify Course function can also be accessed from the Quick Actions prompt.
Fire by Course
The Fire by Course function allows the user to fire all the items in the course. If there are multiple courses in the same check, each course appears on a separate tray in the QSR.
Create a check and add items.
Navigate to Jump Bar ➜ Function Screen. The Function Screen appears.
Select Fire by Course. The Fire by Course prompt appears.
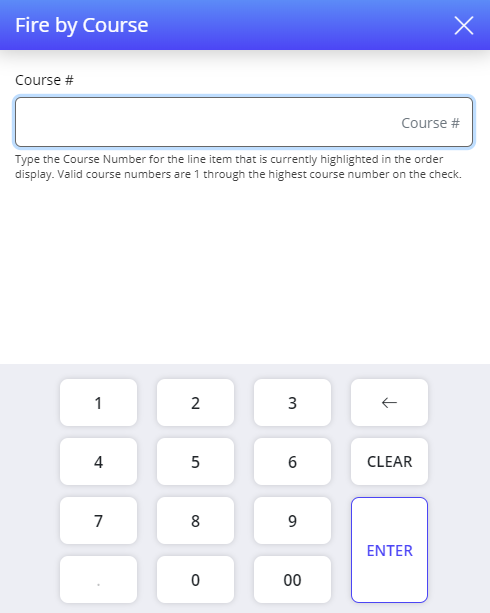
Enter the course number to fire.
Select Enter.
Once the check is saved, the items in the course are fired to the kitchen.
Important Points
-
The items in the course can be on hold and fired later.
-
The Fire by Course function can be performed only on an open check.
-
A message, No course in Check appears if the user tries to perform Fire by Course function when there is not any course available in the check.
-
A message, The course number is invalid. Valid course numbers: 1-x appears if the user tries to enter a course number that is not present in the check. Here x represents the number of courses available in the check.
-
If all items in a course are already fired and then the Fire by Course function is selected, a message, There are no items to fire in course appears.
-
The Fire by Course function does not have any impact on the real time QSR.
-
The Fire by Course function can also be accessed from the Quick Actions prompt.
Terminal Options Supported
|
Field |
Description |
|---|---|
|
156 (Use Real-Time Kitchen Video Interface) |
If this terminal option is enabled, the check-level transactions are sent to the kitchen video system in real- time. It is applicable only for QSR. |