


Scheduling
After report group destinations are defined, schedule the report group to print to the defined location in the POS Schedule menu of the IGCM.
Task Scheduling provides a way to schedule and launch tasks on one or more servers. This scheduling applies to both InfoGenesis tasks as well as user-defined tasks. Examples of user-defined tasks are: scheduling an executable, scheduling a report group to run on demand or at an exact time, an employee export, or SQL database maintenance.
POS Schedule
Tasks are scheduled on the POS Schedule menu, which is a data grid that can be widened, sorted, and grouped by any column. Results are filtered at the store level.
Users must navigate to Reports ➜ Scheduling ➜ POS Schedule. The following screen appears:
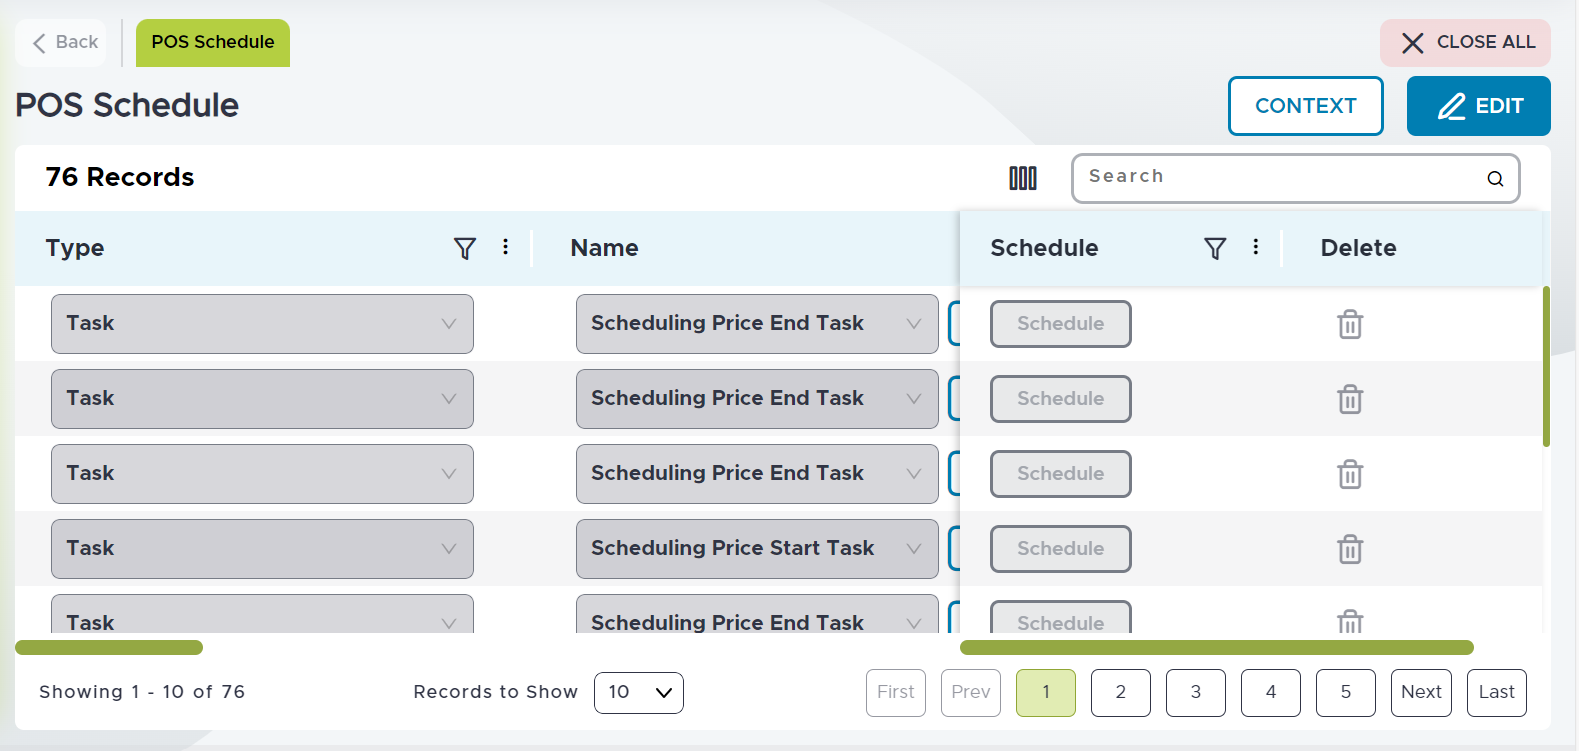
Perform the following steps to set up a schedule for report groups and tasks:
Select the Edit icon.
Refer to the following table and fill in the fields as necessary:
|
Field |
Description |
|---|---|
|
Type |
Select the type of task to schedule from the drop-down list:
|
|
Name |
Select the name of the task or report group. When Task is selected as the type, a list of the configured task names appears. When Report Group is selected as the type, a list of the configured report group names appears. |
|
Pause |
Selecting the Pause checkbox prevents the task or report group from launching at its regularly scheduled time. When this checkbox is deselected the task or report group launches at the scheduled intervals. |
|
Time Zone |
Displays the time zone in which the schedule runs. |
|
Frequency |
Displays the frequency of the scheduled action. |
|
Scheduled Time |
The time the action is scheduled for. |
|
Customer |
Displays customer context for scheduled task. |
|
Enterprise |
Displays enterprise context for scheduled task. |
|
Division |
Displays the division for scheduled task. |
|
Store |
Displays the store for scheduled task. |
|
Scheduled By |
Displays the user that scheduled the task. |
|
Destination |
This button is only selectable for Report Group tasks. Selecting this button displays the Configure Report Destination prompt, where the report group output settings are changeable. By default, the values in this field are the previously defined values in the Configure Report Destination prompt accessed from the Destination button in the Report Group: Basic Details sub-menu for the selected report. A different destination is possible by selecting one of the E-mail, Printer, or File Path options. |
A single report group can be scheduled multiple times to output at different destinations from the POS Schedule menu. For example, Report Group A can be scheduled to print at a printer, and then another schedule can be configured for Report Group A to output to an email or file path.
Select the Schedule button to schedule the frequency of the task or report group. The Recurrence prompt appears.
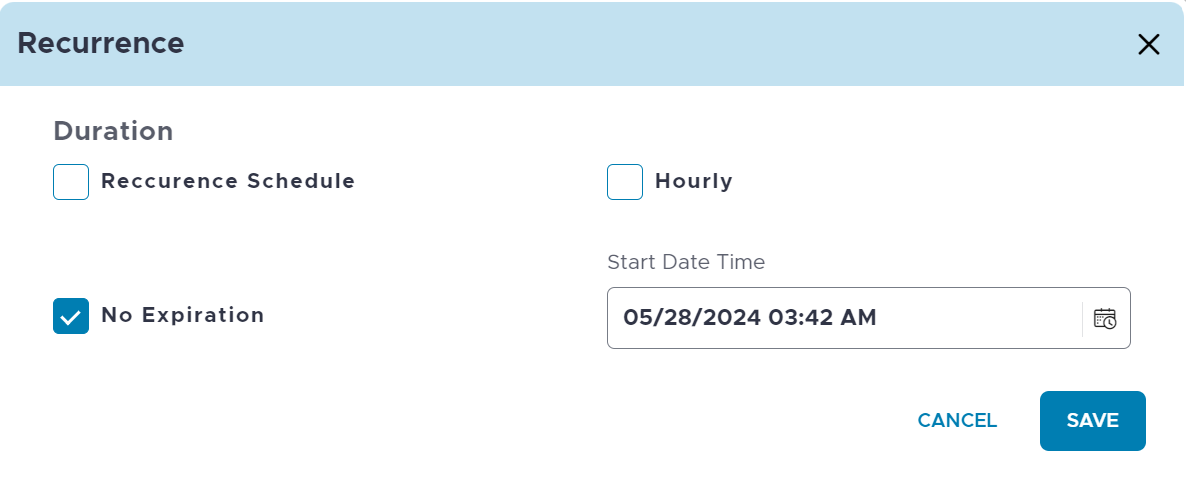
Refer to the following table and fill in the fields as necessary:
|
Field |
Description |
|---|---|
|
Duration |
Select one the following options:
|
|
Start Date Time |
Select the drop-down list to view a calendar. Select the starting date for the task from the calendar. |
Select Save.
Task Setup
InfoGenesis Tasks
|
Task |
Description |
|---|---|
|
Arabic Export |
Supports printing guest receipts in Arabic. |
|
Banquet Export |
Exports banquet data to a file. |
|
Banquet Export Simplified |
Customer-specific custom export of Banquet data. It is an enhanced version of the Banquet Export that includes a time stamp in the file name for the earliest check included in the Export. |
|
Choice Group Export |
Exports Choice Group data to a file. |
|
Choice Group Import |
Imports Choice Group data from a file. (Import modifiers before running this import.) |
|
Clock Data Export |
Exports file with employee clock data. Selection for time period. |
|
DataWorks Export (Vintage) |
Exports legacy DataWorks information based on the specified period. (Queries use the it_trn database.) |
|
Employee Export |
Exports file with employee data records. |
|
Employee Import |
Imports employee data from a file. |
|
Folio Import |
Imports folio data from a file. |
|
Food Service Loyalty Item Export |
Exports items to the MM Hayes system using an SFTP server to transfer files. |
|
General Ledger Export |
Generates General Ledger Export files. |
|
Generic Auth Export |
Exports file with generic authorization data, including date of export, posting account number, and account charges. |
|
GA Export Simplified |
Generic Auth Export that also includes a date range |
|
Generic Auth Import |
Imports generic authorization data from files. |
|
Generic Auth Import Expanded |
Imports expanded generic authorization data from a file. |
|
Generic Auth Reset Charge Amount |
Resets generic authorization charge amounts to zero for a given generic authorization type. |
|
GA Import Mapping Tool |
Converts employee records exported from the property’s Human Resource system into the required format for seamless import into the POS system. |
|
Generic Auth Update Posting for Offline Trans. |
Updates generic authorization (GA) posting numbers and account names for offline transactions. |
|
Gratuity Summary Export |
Exports file with summarized gratuity information. Selections for time period, and profit centers or profit center groups. |
|
Item Export |
Exports file with item data records. |
|
Item Import |
Imports item data from a file. When the Enable Import via Web Service in the Parameters tab is selected, the items are imported with the translation text. |
|
Layout Export |
Export buttons found on Screen layouts, Container layouts, and Floor Plan layouts. The output file, named layout_exp.txt, will be sent to the InfoGenesis\Export folder. |
|
Layout Import |
Import buttons found on Screen layouts, Container layouts, and Floor Plan layouts. The utility will use the import file, named layout_imp.txt, found in the InfoGenesis\Import folder. |
|
Modifier Export |
Outputs Modifier data to a file. |
|
Modifier Import |
Imports Modifier data from a file. When the Enable Import via Web Service in the Parameters tab is selected, the modifiers are imported with the translation text. |
|
Move SKU Files |
Moves the SKU_Log.txt file from its current folder to the export folder. |
|
Order Table Export (Vintage) |
Exports legacy detailed order table information based on the specified period. (Queries use the it_trn database.) |
|
Prepare Terminal Data |
Prepares configuration data so terminals can use this data when reloaded. |
|
Prepare Terminal Data for All Stores |
Prepares configuration data for every store in the current enterprise. The new data is accessible at terminals after Reload Config is selected. |
|
Product Mix Export |
Exports file with item sales information. Selections for time period, report totals, sales interval, and profit centers or profit center groups. |
|
Product Mix Export Maintenance |
Renames product mix export files. Searches the export folder for files named R_*.TXT and renames the file to R_*_yyyymmddhhmmss.exp. (Example: R_M_Sales.txt becomes R_M_Sales_20130131133155.exp) |
|
Purge Audit Logging Track Tables |
Purges data in all databases containing track tables. Track tables are used by the Audit Logging Viewer. A value can be specified for the number of days of data to keep. |
|
Purge Business Day Tables (Vintage) |
Purges legacy cumulative Business Day tables based on the specified retention period. System task. |
|
Purge Business Detail Transactions |
Purges transactions from the ig_business database detail tables based on the specified retention period. |
|
Purge Business Summary Transactions |
Purges transactions from the ig_business database summary tables based on the specified retention period. |
|
Purge Calendar Day Tables (vintage) |
Purges legacy cumulative "Calendar Day" tables based on the specified retention period. System task. |
|
Purge Patron Details |
Purges patron ID and name details from the check_casino_table. Configure the number of days for which the guest information must be removed in the Days parameter. After the task is run, the Patron ID and Patron Name fields in the Check Tender Detail with Casino Information report appear as blank fields |
|
Remove Personal Data |
Removes personal data from InfoGenesis databases to comply with GDPR requirements. Personal data is defined in the GDPR as any identifiable information relating to a person directly or indirectly, such as a guest’s name, identification number, location, or to one or more factors specific to the physical, physiological, genetic, mental, economic, cultural, or social identity of that person. Configure the Days parameter to configure how long guest names are retained in the database. All guest names stored longer than the configured number of days are overridden. After running the task, the account names in the database are replaced with “Guest name not available.” The following permission groups have permission to run the task by default: Enterprise Admin, POS Administrator, and POS Task Administrator. |
|
Revenue Summary Export |
Exports file with summarized revenue information. Selections for time period, and profit centers or profit center groups. |
|
Roll Business Period |
Rolls the enterprise's business period using the current POS Server time. |
|
Server Summary Export |
Exports file with summarized server information. Selections for time period, and profit centers or profit center groups. |
|
SMU UnLock Terminal |
Sends an SMU command to unlock terminals in the store. |
|
SMU 86 Item |
Sends an SMU command to 86 a specified item. Deprecated, see 86/Un-86 Management for enhancement. |
|
SMU Go Offline |
Sends an SMU command to take terminals in the store offline. |
|
SMU Go Online |
Sends an SMU command to bring terminals in the store online. |
|
SMU Lock Terminal |
Sends an SMU command to lock terminals in the store. |
|
SMU Reboot Terminal |
Sends an SMU command to reboot terminals in the store. |
|
SMU Reload Kitchen Printer Service |
Sends an SMU command to reload the Kitchen Printer service. |
|
SMU Reload Terminal Config |
Sends an SMU command to reload terminal's configuration in the store. |
|
SMU Reset X & Z Terminal Reports |
Sends an SMU command to reset a terminal's X and Z offline shift reports in the store. |
|
SMU Un86 Item |
Sends an SMU command to un86 a specified item. Deprecated, see 86/Un-86 Management for enhancement. |
|
SMU UnLock Terminal |
Sends an SMU command to unlock terminals in the store. |
|
Special Instruction Export |
Exports Special Instruction data to a file. |
|
Special Instruction Import |
Imports Special Instruction data from a file. |
|
Tax Summary Export |
Exports file with summarized tax information. Selections for time period, and profit centers or profit center groups. |
|
Tender Summary Export |
Exports file with summarized tender information. Selections for time period, and profit centers or profit center groups. |
Configure User-Defined Tasks
Users can set up and configure task scheduling on the Task Setup menu.
Perform the following steps to set up and schedule tasks:
Navigate to Reports ➜ Scheduling ➜ Task Setup. The following screen appears:
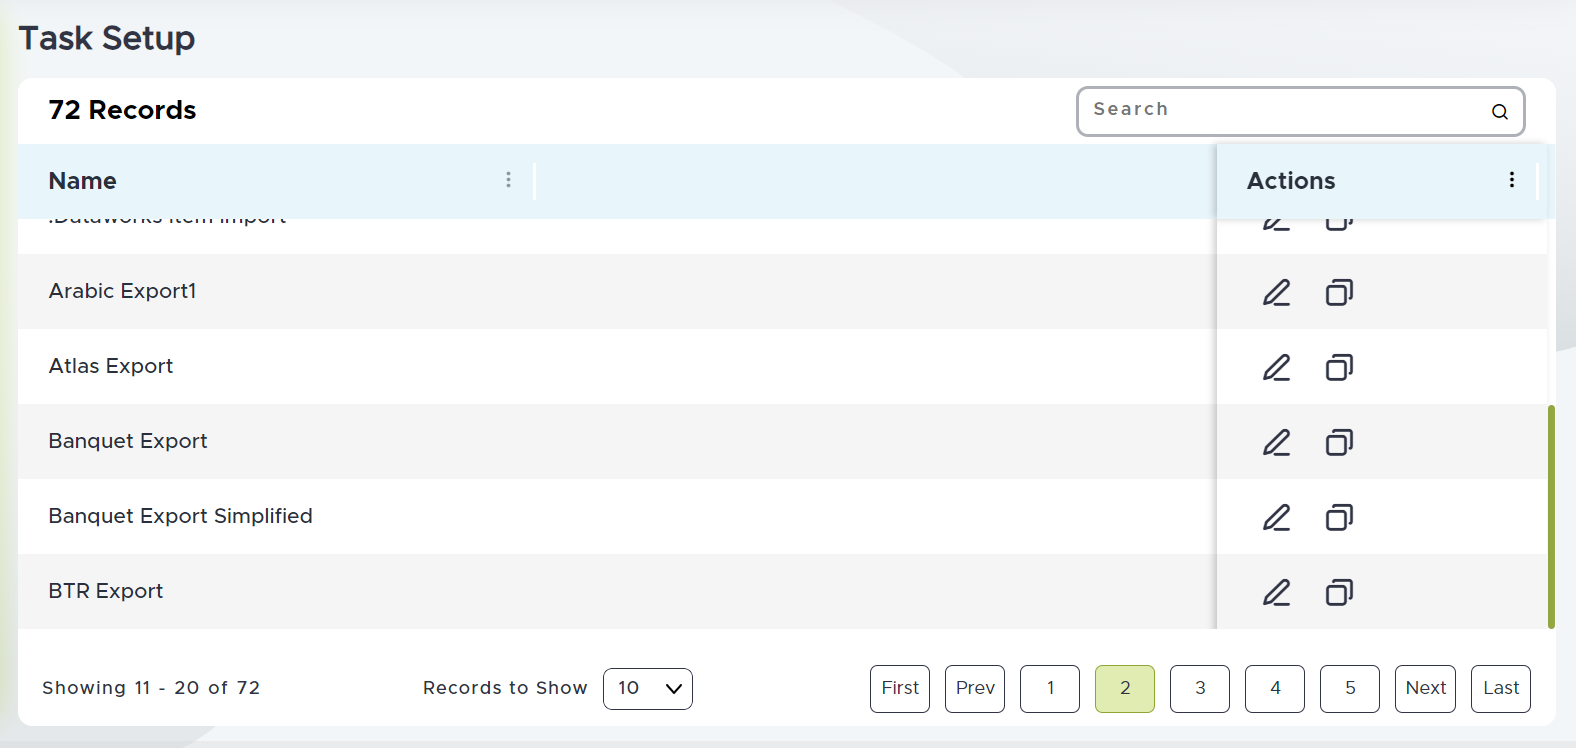
Select the Edit icon. The following screen appears:
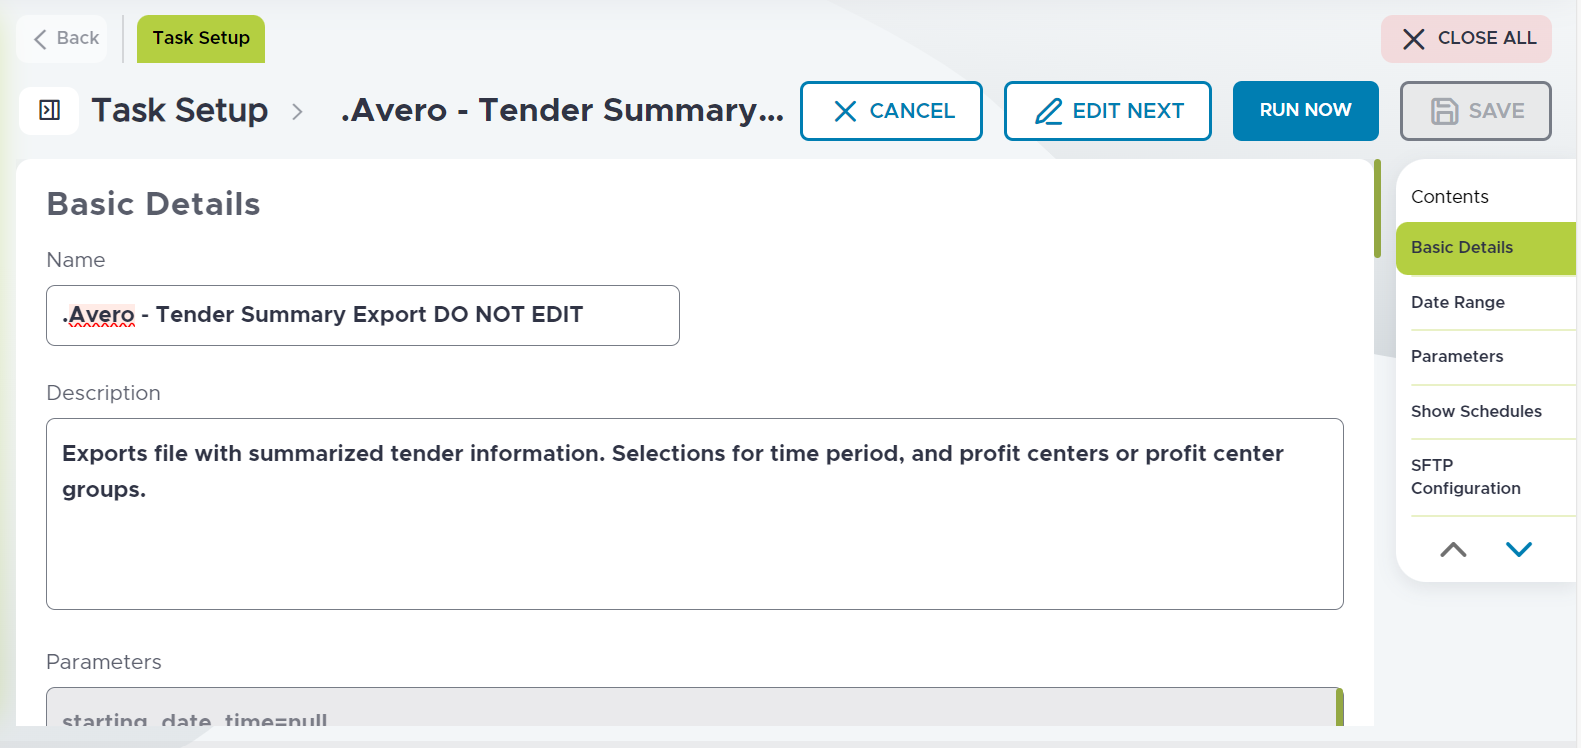
Refer to the following table and fill in the fields as necessary:
|
Field |
Description |
|---|---|
|
Name |
Enter a unique name for the task. |
|
Description |
Enter a brief description for the task. |
|
Parameters |
Parameters are only accessible for system tasks. |
Date Range
Navigate to Date Range. The following screen appears:
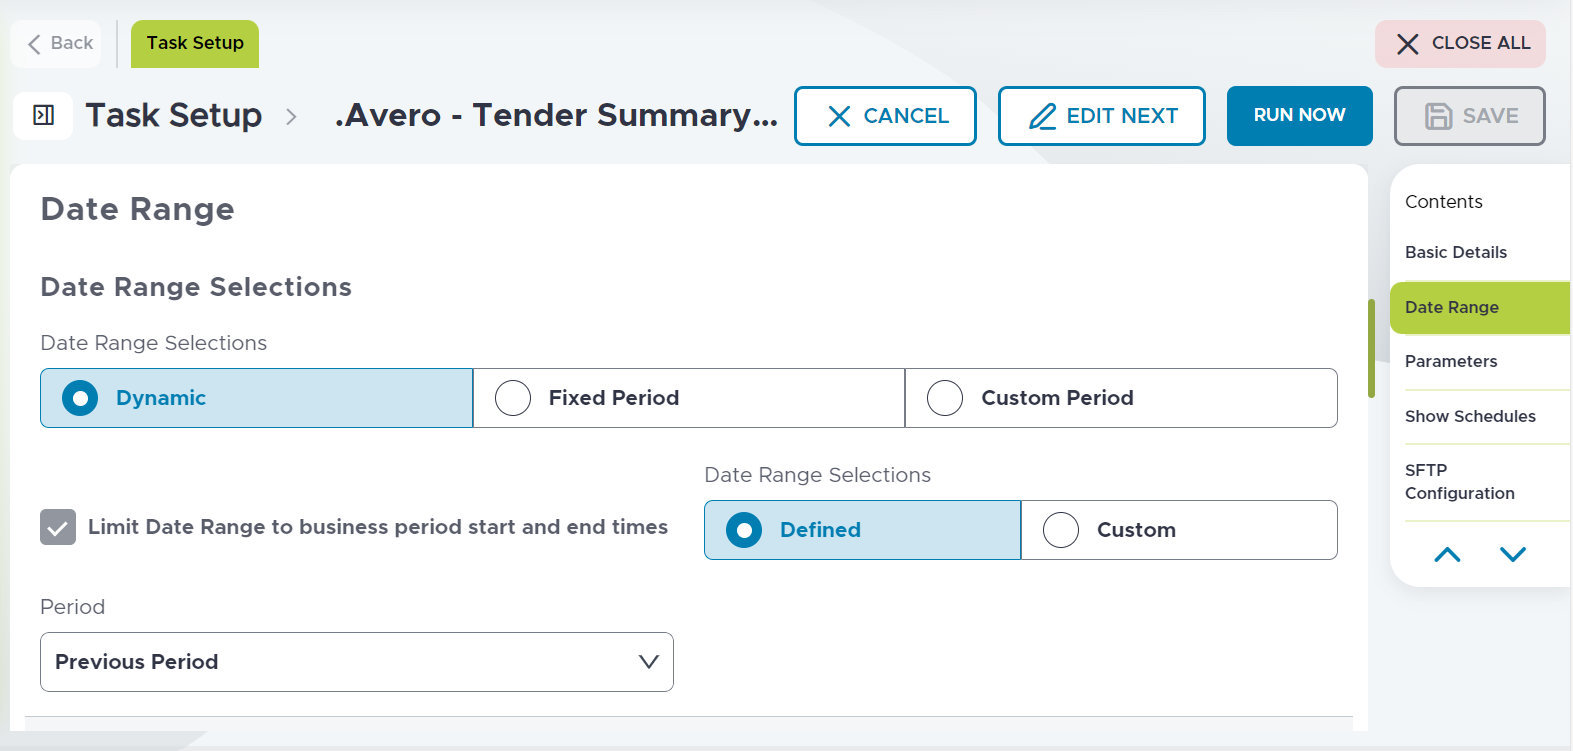
Refer to the following table and fill in the fields as necessary:
|
Field |
Description |
|---|---|
|
Date Range Selections |
Select one of the following options:
|
|
Limit Date Range to business period start and end times |
This field cannot be edited. |
Parameters
Navigate to Parameters.
Show Schedules
The Show Schedules sub-menu displays all schedules associated with the Task.
SFTP Configuration
Navigate to SFTP Configuration.
Refer to the following table and fill in the fields as necessary:
|
Field |
Description |
|---|---|
|
SFTP Setup |
Enable the checkbox to configure the SFTP settings. |
|
Task Type |
Select Export or Import for exporting or importing the files to and from the SFTP folder. |
|
SFTP Path |
Select one of the following options:
|
|
Authentication Type |
|
|
Use System SSH Key |
Enable this option to pre-populate the SSH key in the Private Key field from the value configured in the ConMan utility. The SFTP Configuration-System SSH option must be enabled in the Permissions Group section. Otherwise, the Use System SSH Key option will be disabled. The SFTP Configuration System SSH option is enabled by default for AHS permission group only. |
Select Save.