


Release 12.3.13
12.3.13 (12.x Server Only)
Multi-Guest Functionality Support for Loyalty & Promotions
InfoGenesis POS has been enhanced to support multiple guest functionality at the POS terminal for Loyalty & Promotions. Previously, users were all allowed to associate only one guest per check, and users had to split checks to apply promotions for multiple guests. With this enhancement, the following changes are available at the POS terminal:
-
Swipe guest pass or enter card number to perform inquiry and tag multiple guests
-
Navigate between guests using guest panel
-
Add items for multiple guests associated on a check
-
Assign and edit a primary guest on check.
-
Create a placeholder guest or keep the guest anonymous by creating a blank guest profile
-
Apply promotions for multiple guests on a check
Limitations
The following functionality is not supported for multi-guest:
-
Advance Seat(#187) function button is not supported.
-
Creating a master check is not supported.
-
EJ events for Surveillance logging are not supported for multi-guest functionality.
-
Secondary display is not supported.
-
Tray Total(#349) function is not supported.
Prerequisites
The latest version of the following add-ons must be mapped to the Integration Application Service module type in License Administration for Loyalty:
-
IAS_Channel_NAME_<version>
-
IAS_Adapter_NAME_<version>
Configurations in IGCM
Configure Multi-Guest Functionality
Perform the following configuration in the mentioned menus and submenus to support multi-guest functionality:
|
Menu |
Submenu/Section |
Field/Checkbox |
Configuration |
|
|---|---|---|---|---|
|
Terminal Group |
Multi Guest Configuration |
Enable multi guest support checkbox |
Select this checkbox to enable adding multiple guests to the check. |
|
|
Profit Center |
Loyalty Configuration |
Enable multi guest support checkbox |
|
|
|
Settings.ini |
Multi Guest Configuration section |
Function Shortcut field |
|
Select Save.
Configure IAS Adapter
Navigate to POS Configuration ➜Interfaces ➜IAS Adapter Configuration Group.
Select Add.
Create a record in this menu for Loyalty.
In the Basic Details submenu, enter the name in the Configuration Group field. The Site Guid field displays an autogenerated value and the field cannot be edited.
In the Mapping submenu, the adapter configured for this adapter group is displayed after the mapping.
Select Save.
Navigate to POS Configuration ➜Interfaces➜IAS Adapter Configuration.
Select Add.
Refer to the following table and fill in the fields:
|
Field |
Description |
|---|---|
|
ID |
Enter an ID for the IAS Adapter. |
|
Configuration Name |
Enter a preferred name for the IAS Adapter. |
|
Use Global IAS |
Leave this checkbox enabled. |
Under the Settings submenu, enter values for the fields as captured in the following table:
|
Field |
Description |
|---|---|
|
Channel Name |
Select Payment from the drop-down list. |
|
Adapter Name |
Select Loyalty ACES from the drop-down list. |
|
Adapter Category |
This value is auto filled as Loyalty when the channel and adapter names are selected. It is a read-only field and cannot be edited. |
|
Field |
Required |
Description |
|---|---|---|
|
Engage.MemChargePayMethodId |
No |
This value can be obtained from the PaymentMethodId column of the ARPostingConfiguration table in the Visual One Accounting (usually V1Acct) database. If no records exist for the profit center, contact Loyalty & Promotions Engineering. |
|
Engage.MemChargePostPropId |
No |
This value can be obtained from the PostToPropertyId column of the ARPostingConfiguration table in the Visual One Accounting (usually V1Acct) database. If no records exist for the profit center, contact Loyalty & Promotions Engineering. |
|
Engage.Password |
Yes |
The password configured in Loyalty & Promotions for the external system (InfoGenesis). To view the password, navigate to Loyalty & Promotions➜ External System Configuration ➜ External System and enter the value available in the Password field. |
|
Engage.url |
Yes |
The URL where Loyalty & Promotions is hosted. Default: https://<IP Address > |
|
Engage.username |
Yes |
The username configured in Loyalty & Promotions for the external system (InfoGenesis). To view the username, navigate to Loyalty & Promotions➜ External System Configuration ➜External System and enter the value available in the User Name field. |
|
Engage.CardPin |
No |
The pin obtained from Loyalty & Promotions system. |
|
Engage.sourceSiteId |
Yes |
Site ID configured in Loyalty & Promotions. To view the sourceSiteID, navigate to Loyalty & Promotions ➜Corporate Setup ➜ Site and enter the value available in the Site ID column. |
|
Engage.sourceCorpId |
Yes |
Corporate ID configured in Loyalty & Promotions. To view the sourceCorpID, navigate to Loyalty & Promotions ➜Corporate Setup ➜ Site and enter the value available in the Corporate ID column. |
|
Engage.sourceSystemName |
Yes |
The system name configured in Loyalty & Promotions for the external system (InfoGenesis). For example, INFOGENESIS. To view the external code, navigate to Loyalty & Promotions➜ External System Configuration ➜ External System ands enter the value available in the System Code field. The value entered here must match the value entered in the Engage.SourceSystemCode field. |
|
Engage.GuestCardNumber |
No |
The default guest card number obtained from Loyalty & Promotions. |
|
Engage.GuestUniqueID |
No |
The unique ID for guest obtained from Loyalty & Promotions. |
|
Engage.SourceSystemCode |
Yes |
The system code configured in Loyalty & Promotions for the external system (InfoGenesis). For example, INFOGENESIS. To view the external code, navigate to Loyalty & Promotions ➜ External System Configuration ➜ External System and enter the value available in the System Code field. The value entered here must match the value entered in the Engage.SourceSystemName field. |
|
Engage.corpCode |
Yes |
The Corp Code obtained from Loyalty & Promotions. Navigate to Loyalty & Promotions ➜Corporate Setup > Corporate and double-click the corporate record. In the pop-up screen that appears, the value in the Corporate Code field is the corporate code. |
|
Engage.tenderCode |
Yes |
The Card Code of a tender created in InfoGenesis must be mapped to a corresponding tender code provided by Loyalty & Promotions for that tender. Sample mapping: Cash=CSH, Points=CsBucket10, Vouchers=PtBucket2 This loyalty integration will work only for the tender codes mapped here. |
|
Engage.RequestType |
Yes |
Configure the value as 10011 for InfoGenesis. This will obtain profile info, bucket balances, and vouchers info from the Loyalty & Promotions system. 10000 - fetches profile info from the Loyalty & Promotions system 01000 - fetches Bucket Balances from the Loyalty & Promotions system 00100 - fetches Promotion info from the Loyalty & Promotions system 00010 - fetches Golf Rounds info from the Loyalty & Promotions system 00001 - fetches Vouchers info from the Loyalty & Promotions system |
|
Engage.KeySize |
No |
The Key Size for PIN encryption provided by Loyalty & Promotions Loyalty & Promotions. The key size must always be 256. |
|
Engage.BlockSize |
No |
The Block Size for PIN encryption provided by Loyalty & Promotions. The block size must always be 128. |
|
Engage.HashKey |
No |
The Hash Key for PIN encryption obtained from Loyalty & Promotions. Navigate to the folder where Loyalty & Promotions is hosted, for example, C:\inetpub\wwwroot\AgilysysEngage and open the appsettings.json file. The value in the ENCRYPTION KEY field is the hash key. |
|
Engage.Salt |
No |
The Salt for PIN encryption obtained from Loyalty & Promotions. Navigate to the folder where Loyalty & Promotions is hosted, for example, C:\inetpub\wwwroot\AgilysysEngage and open the appsettings.json file. The value in the IV_KEY field is the hash key. |
In the Tender Mapping section, select the tender configured from the drop-down list.
Configure Settings.ini
Navigate to POS Configuration➜Profiler➜POS Terminal.
Select Edit for the appropriate profile.
Navigate to the Files submenu and select the Settings.ini tab.
In the Settings section, set the SendTricklePostingtoIAS field to True.
Navigate to the Integration Application Configuration section.
Refer to the following table and fill in the fields:
|
Field |
Description |
|---|---|
|
GlobalIAS |
https://10.10.10.10:8118 (8117 in case of http) Replace 10.10.10.10 with the IP address of the server where the IAS pod is installed. |
|
IsIAS |
Enter true. |
|
LocalIAS |
https://10.10.10.10:8118 (8117 in case of http) Replace 10.10.10.10 with the IP address of the server where the IAS pod is installed. |
Select Save.
Display Offline Transactions in IAS Postings
Navigate to Utilities➜Utilities➜IAS Postings.
Refer to the following table and fill in the fields:
|
Field |
Description |
|---|---|
|
Adapter Category |
Select Loyalty from the adapter category. |
|
Adapter Subcategory |
Select the appropriate adapter subcategory. The following are the available options when Loyalty is selected as Adapter Category:
|
|
Event Type |
Select Loyalty as the event type. The following are the available options when Loyalty is selected as Adapter Category:
|
|
Event Status |
Select the appropriate event status. The following are the available options:
|
|
Start Date |
Select the start date from which IAS postings must be displayed. Maximum Range - 180 days. |
|
End Date |
Select the end date up to which IAS postings must be displayed. |
Select Search to view IAS postings based on the selected filters and date range.
Offline tenders will not be displayed in the IAS postings menu during processing state.
If a partial tender occurs with any of the offline tenders, accrual and redemption of the whole check will be posted only after the offline tender sale is successful.
Configure Terminal Options
Navigate to POS Configuration➜Terminals➜TerminalOptionGroup.
Navigate to Terminal Options submenu.
Refer to the following table and enable or disable the following terminal options:
|
Terminal Options |
Description |
|---|---|
|
347(Allow items and checks to be discounted multiple times) |
Enable this option to allow checks to have up to 8 item level discounts on each item plus up to 8 check level discounts. Any discount's Exclusive property may limit an item or check to fewer discounts. When this option is enabled, more than one check level discount can apply to the same revenue group, multiple discounts are always applied to the gross item price, and the settings of terminal options 11, 345, and 346 are ignored. This terminal option is mandatory to support multi-guest functionality at the terminal. |
|
1221(Prompt for player account details for casino payments) |
Enable this option to prompt for player account details even when a player account is already assigned to the check when performing an enhanced casino/loyalty payment using Tender Verification Codes 97(Casino Voucher), 98(Casino Points), 238(Casino Points and Offers), 239(Engage - Points) and 240(Engage - Offers/Vouchers). |
|
1263(Enable Engage Loyalty) |
Enable this option to support the loyalty functionality at the terminal. This terminal option is mandatory. |
|
1270(Capture Guest Information for Engage Loyalty) |
|
|
1284(Give best discount to guest while applying promotions) |
|
|
1357(Enable CORe PMS via Engage Loyalty) |
This terminal option is not applicable. Keep this terminal option is disabled. |
|
1384(Restrict membership charging to one account) |
|
|
1408(Display member additional details for Agilysys loyalty) |
|
|
1426(Support member and non-member auto promotions from same terminal) |
|
|
1427(Enhanced Agilysys Loyalty Promotions) |
When this terminal option is enabled, Enhanced Agilysys Loyalty promotions (Rule Engine) will be supported. This feature is available with System version 12.3.12 and above. This option must be enabled mandatorily to support multi-guest functionality at the terminal. |
|
1468(Enable to confirm guest selection during loyalty guest or account inquiry) |
Enable this terminal option to confirm selection of guest even when there is only one guest in the guest search result during inquiry or tender. This applies to loyalty tenders only. |
Select Save.
Implementation at the POS Terminal
Tag Multiple Guests
Users can associate multiple guests with a check using Loyalty Inquiry(#456). To tag multiple guests, users must perform this function multiple times. Every time a new guest is inquired, they are tagged upon confirmation.
Navigate to Functions➜Loyalty Inquiry. The guest information screen prompting for input is displayed.
-
Card Number
-
Guest Info
Select the input type and provide the appropriate input based on the selected input type.
Select the guest and select Next. Details such as guest information, available points and vouchers will be displayed, and the guest will be associated with the check. The user can only view the information on this screen and cannot apply the points or vouchers to the check.
The Inquiry screen displays Select All or Clear All option at the top based on the action performed. If all guests are selected, Clear All option is displayed at the top to provide users with an option to clear selection if preferred.
A new check is opened, and the guests are associated with the check one at a time. The guest panel is displayed with associated guests on a vertical scroll bar.
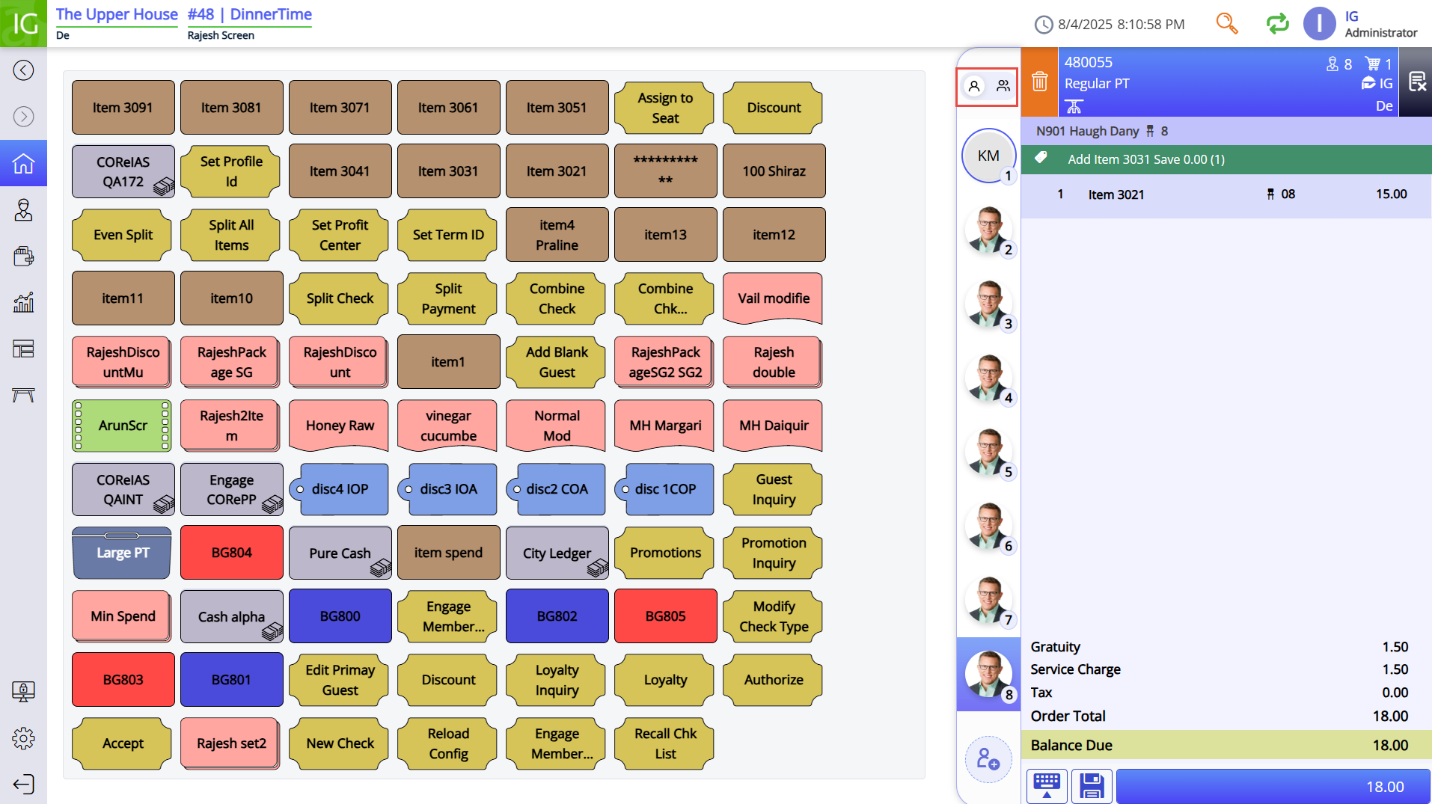
The members are listed in chronological order of their seat numbers. The selected group member is highlighted in blue, and the primary guest of the group is highlighted with a ring around their image in the panel and pinned at the top irrespective of their seat number.
The color of the ring varies based on the theme set for the POS Terminal. For example, if Dark theme is set for the terminal, a blue ring is displayed to highlight the primary guest.
Sample
Guests with restrictions such as alcohol are highlighted with a red ring around their image.
Add Funds
The Add Loyalty Funds (#2030) function enables the Loyalty & Promotions Loyalty users to add funds to their eCash, Points, Promo cash, and Promo Points account.
Select the preferred guest from the vertical bar to add funds.
Navigate to Functions➜Add Loyalty Funds (#2030).
Select the input type and provide the appropriate based on the selected input type. The associated account with all the members in the group is displayed.
Select the guest’s preferred Account (Bucket) type for crediting the amount. The Add Loyalty Funds prompt is displayed.
Select the preferred input type and enter the card number or guest info (phone, email, first name or last name) to perform the guest search.
Select the appropriate guest account from the list and select Next.
Enter the preferred amount to be credited to guest’s account and select Done. The Select Tender prompt will be displayed.
Select the preferred tender to add the funds to the guest’s account. The guest will be associated with the check and the amount to be added to the guest’s account will be displayed in the check view.
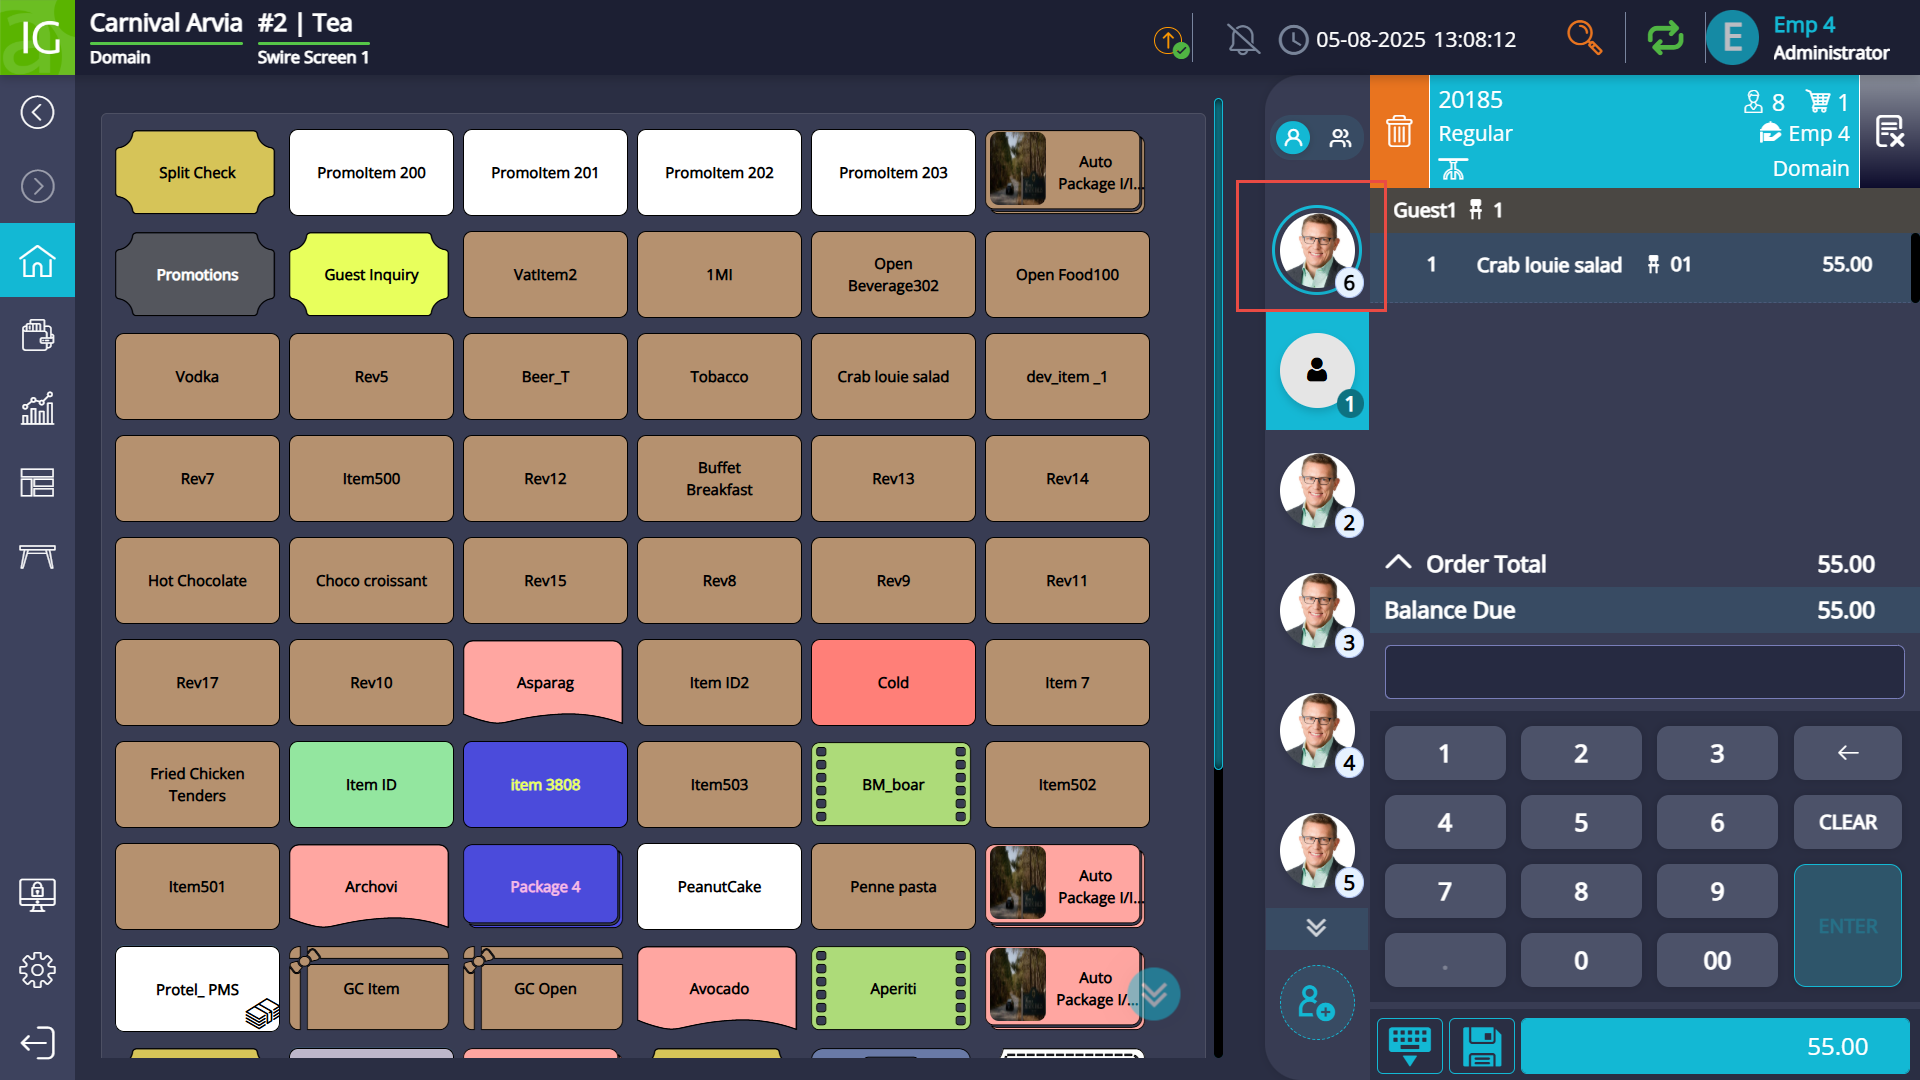
Select the All mode toggle available on top of the vertical bar to switch between a single guest to all guests. The check displays all items, and the summary displays discounts added to the check based on the members’ eligibility.
Scroll down the view the check summary.
Users can also complete the transaction to close the check after adding funds.
Select tender to complete the transaction. The check is tendered under the primary guest tagged to the check. If during tender, a primary guest is not recognized, users are prompted to perform guest inquiry and assign a primary guest to complete the payment.
Edit Primary Guest
The Edit Primary Guest(#2100) function enables users to modify the existing primary guest in a group during guest inquiry.
Navigate to Functions➜Edit Primary Guest. The Edit Primary Guest screen listing all the available guests in a group is displayed. All the guest names have a radio button available next to them for selection.
The existing primary guest is auto selected and indicated with the status Current.
Assign a new primary guest by selecting the preferred guest and Confirm. The primary guest is updated.
Blank Guest
The POS terminal supports adding guests without guest information. This enables users to add guests as placeholders or keep guests anonymous. Users can add blank guests on checks using the Add Blank Guest(#2101) function.
Navigate to Functions➜Add Blank Guest. A blank guest is added to the check and the guest panel.
Users can also add blank guests using the guest panel.
Select the Add button available on the guest panel. A blank guest is added to the panel directly.
When only one guest is available on the panel, the Add button is available on the bottom of the panel.
Remove Guest
Users can remove guests from the guest panel.
Long-press preferred guest from the guest panel to open the guest information screen.
Select the ellipsis. The Remove Guest option is displayed:
Select Remove Guest. A warning prompt is displayed.
Select Proceed. A toast message, <Guest name> guest removed successfully, is displayed.
Guests can also be voided from the panel by moving all their items to a different guest and voiding the items.
To add items to a voided guest, users must perform the guest inquiry again and associate the guest to the check. Once the guest is associated again, any previously voided items are also appended along with the new ones.
Switch Seat
Users can switch all items ordered for a particular seat to another seat. To achieve this, users must perform the Switch Seat(#2089) from the Functions screen.
Since the Switch Seat and Modify Seat functionalities are similar, the Switch Seat feature will be enabled by default for the job codes that have access to the Modify Seat functionality.
If a user wants to disable or enable the Switch Seat option, they can do so by modifying the settings using the Switch Seat function button.
When multiple guests are associated with a check, the following points will be applicable:
-
All items and promotions allotted for a guest are reallocated to the new seat when the seat is switched.
-
Switching seats is supported for both occupied and unoccupied seats.
Restore Voided Guest
To restore a guest back to the guest panel, users must perform loyalty inquiry. In the guest information screen, users must select the previously voided guest and select Tag To Check.
Modify Seat
Users can also modify seats for the guests associated with the check using the Modify Seat (#95) function button.
Once the seat numbers are modified, they are updated and highlighted with a green tick symbol.
When seats are modified, promotions applied are also removed. If the guest is eligible for promotions when the seat is modified and items are reassigned, applicable promotions are reapplied.
If items are reassigned to an unoccupied seat, a blank guest is created, and the items are assigned to the blank guest.
Split Check
Users are allowed to split check that contains multiple guests tagged to it. Checks can be split in the following ways:
-
Split by Seat
-
Split by Course
-
Split by Item
Split by Seat
When a check containing multiple guests is split by seat, the following attributes are maintained at the POS terminal:
-
Splits are generated based on the number of seats available on the check.
-
All the guests associated with main check are tagged on all individual splits.
-
Only the items specific for the assigned seat are added on the split check.
-
The primary guest is retained as the primary guests across all the splits.
-
Users can move items across split checks. Any item-based discounts added will be moved along with the item. Check level discounts are applied across all the checks with updated values based on the items eligible on the split checks.
Split by Course
Items are split based on the courses assigned on the check.
Split by Item
When users choose to split the check by items, all the items added under one guest will be moved to the other check.
Assign to Seat
Users can access the Assign to Seat option as a separate function instead of an option within the Split Check screen when using multi-guest functionality.
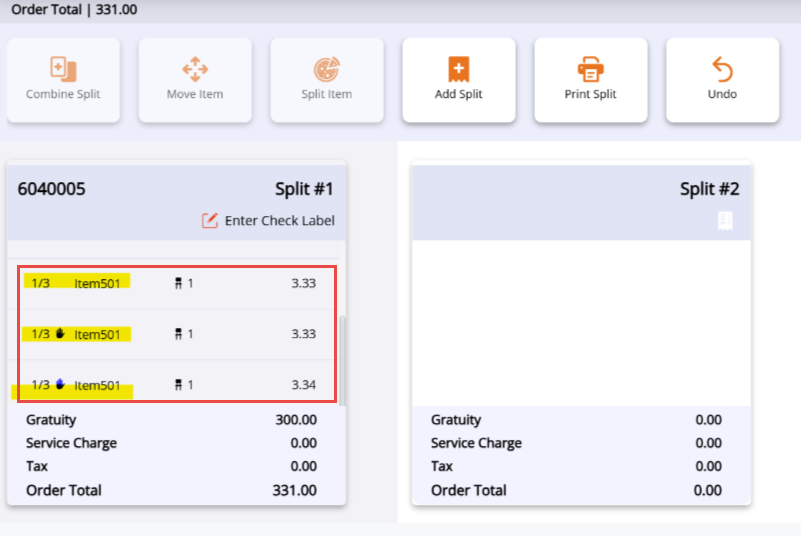
Assign to Seat function also enables users to move items between checks and the item’s seat information is updated on the split check. When Assign to Seat is selected, all items in the check are split into individual checks based on seat numbers. If a single item is split, it is split in the same check and not moved to a new check. The guest and the seat assigned previously is retained.
For example, if one quantity of Soup priced at $10 is split, it is split into 3 portions and the price is also divided for 3 quantities, $3.33, in the same check.
The POS terminal verifies any restrictions applicable for guest before moving an item from one guest to another. For example, if guest A has alcohol restriction, an alcoholic beverage available on the guest B’s check cannot be moved under guest A. Users are prompted at the terminal if multiple items are moved and one or more items are restricted.
Combine Check
Combine Check(#7) function is supported for checks containing multiple guests associated.
The following attributes are maintained the terminal when checks with multi-guests are combined:
-
Only checks containing multiple guests can be combined with each other. Checks with a single guest cannot be combined with checks containing multiple guests.
-
The new check items are added on the main check and seat numbers are appended in chronological order.
-
Primary guest, if previously assigned, is retained after the checks are combined.
-
Users are restricted from combining checks if the overall guest count exceeds 25.
-
Any blank guests added in split checks are retained and added as blank guests after combining checks as well.
-
After combining checks, any seat specific discounts added along with the items are retained on the main check. Discounts and the check financials of only the base check are retained.
-
If a guest is present on more than one check, only the items will be combined.
Tendering the Check
Open a check.
Navigate to Functions➜Loyalty.
Enter the preferred method of input and associate all or few selected guests with the check.
Select the preferred guest from the guest panel and add items specific to the guest. The POS terminal displays prompt if the guest is restricted to purchase any item.
Repeat this step to add items particular to each guest available on the guest panel.
Select All Guest mode to view the consolidated summary of all items added for all guests.
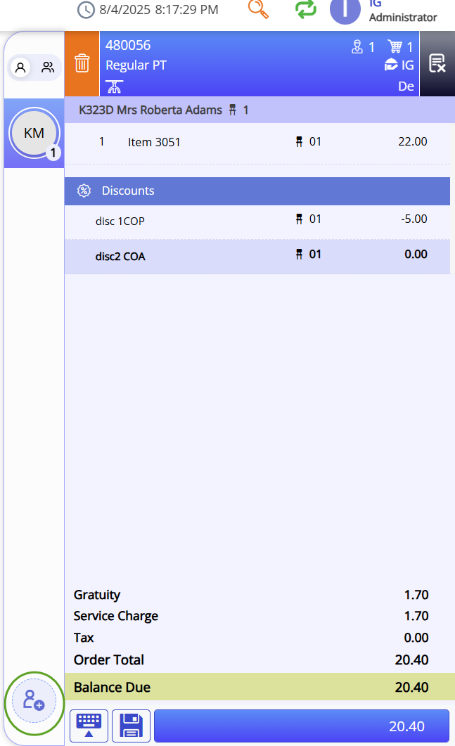
Discounts
Any item discounts added are displayed under the items and check level discounts are displayed at the bottom of the check along with the seat number of the guest for whom the discount was provided.
Tender discounts are applied after the guest inquiry and before tender at the POS terminal.
Only 8 check level discounts can be applied on the check.
A maximum of 50 guest specific discounts be applied on a check, from which a maximum of 4 guest specific discounts can be availed by each guest.
Membership discounts or tier discounts are applied at the check level. When membership discount from more than one member is applied on the check, the discount is calculated based on the amount contributed by the member on the check.
Promotions
Promotions applied are displayed at the bottom of the check as discounts with the seat numbers.
-
Each check can have a maximum of 8 check-level discounts.
-
Each check-level discount is indicated with the seat number of the guest it is provided to.
-
Maximum availing count of a promotion is calculated for each guest individually and not on the number of times a promotion is applied on the check for different guests.
-
Since promotions are applied for eligible guests, the buy and spend rules are also implemented based on guest-wise spending. Promotions are applied successfully, once the configured rules are satisfied by the specific guest.
-
Spend rules with Check Level Rule Criteria (Agilysys Loyalty Suite admin portal➜Promotions➜Promotions➜Rule) are not supported for multi-guest functionality
Select the preferred guest from the panel and navigate to Functions➜Promotions. Eligible promotions are applied for the selected guest.
Navigate to the Tender screen.
Select a tender. Primary guest account is used to tender the check. The card number of the guest is captured automatically since the account is already associated, and the tender is applied. The check is closed successfully.
If a primary guest is not assigned, inquiry is prompted at the terminal based on the tender selected from the Tender screen. The guest information is captured in the check financials, but the guest is not tagged to the check as the primary guest.
Users can also apply multiple partial tenders on the check.
Updated Documentation: Agilysys InfoGenesis POS Integration with Loyalty & Promotions, eCash, Membership Interface