


12.3.15.8 (12.x Server Only)
PMS Integration Enabled through IAS
InfoGenesis POS has been enhanced to expand support for PMS integrations through Integration Application Services (IAS).
This simplifies installation and configuration by eliminating the need for additional integration components, Payment Proxy, or other PMS intermediary layers for XML specifications.
Previously, PMS integrations were performed through the Payment Proxy pod.
With this release, users can choose to integrate using either IAS or the Payment Proxy pod.
By providing a direct integration option through IAS, this enhancement streamlines the architecture, reduces complexity, and improves the overall system performance.
Prerequisites
The latest version of the following add-ons must be mapped to the Integration Application Service module type in License Administration for Loyalty:
-
IAS_Channel_ payment _<version>
-
IAS_Adapter_info1_<version>
Important Points
-
This feature is supported for Agilysys Versa PMS only.
-
Terminal Option 381 (Post directly to XML PMS Interface) is not applicable for this feature.
-
For systems using LAS, the EnableIntegrationApplication flag under Global Configurations must be set to True in the IG App Central.
-
Properties using Agilysys Reserve for seat reservations must ensure that Agilysys Reserve is integrated through IAS instead of Payment Proxy.
Configurations in IGCM
Configure Adapter
Navigate to POS Configuration ➜ Interfaces ➜ IAS Adapter Configuration Group.
Select Add.
Create a record in this menu for the interface with which the property is integrating.
In the Basic Details submenu, enter the name in the Configuration Group field. The Site Guid field displays an autogenerated value, and the field cannot be edited.
In the Mapping submenu, the adapter configured for this adapter group is displayed after the mapping.
Select Save.
Navigate to POS Configuration ➜ Interfaces ➜ IAS Adapter Configuration.
Select Add.
Refer to the following table and fill in the fields:
|
Field |
Description |
|---|---|
|
ID |
Enter an ID for the IAS Adapter. |
|
Configuration Name |
Enter a preferred name for the IAS Adapter. |
|
Use Global IAS |
|
Under the Settings submenu, enter values for the fields as captured in the following table:
|
Field |
Description |
|---|---|
|
Channel Name |
Select Payment from the drop-down list. |
|
Adapter Name |
Select Info1 from the drop-down list. |
|
Adapter Category |
This value is auto filled as PMS when the channel and adapter names are selected. It is a read-only field and cannot be edited. |
Navigate to the Settings submenu.
Refer to the following table and fill in the fields:
|
Field |
Description |
|---|---|
|
HostType |
Enter Info1 as the PMS host type. |
|
Service_URL |
The URL (IP address or FQDN) and port where PMS is hosted. For example, http://<FQDN>: port |
|
Service_IP_Addr |
Specifies the IP address (in dotted quad format) of PMS Host System. When HostType = Info1 and Service_URL is not specified, PMS Host is communicated through the SparseXML TCP/IP protocol. |
|
Service_Port |
Specifies the TCP/IP port PMS Host is listening on |
|
WaitForResponseSecs |
Specifies how many seconds the PMS_XMLInterface.exe Windows service will wait for a response from the PMS Host before reporting a request timeout. |
|
TimeoutSecs |
Timeout in seconds for PMS operations. |
|
SecurityId |
A string that PMS Host may use to validate requests from the PMS_XMLInterface Windows service. |
|
SecurityPassword |
A string that PMS Host may use (in conjunction with SecurityId) to validate requests from the PMS_XMLInterface Windows service. |
|
DontPostZeroAmountPayments |
|
|
ForceAccountAuth |
|
|
WebProtocol |
Specifies the web protocol for PMS communication. Valid values: SparseXML, POST, SOAP, EATEC. Case-insensitive. |
|
NoKeepAlive |
|
|
OverRidePostingTimeOutSecs |
Overrides the timeout in seconds for posting operations. Enter value between 15 to 50. Values below 15 are auto-increased to 15 and values above 50 are auto-decreased to 50. 0 defaults to 50. |
|
TaxToRevenue |
The Tax ID to Revenue Category ID mapping. Multiple mappings must be separated using a comma or space. |
|
ServiceChargeToRevenue |
Mapping pairs for service charge and revenue category in the format: Service Charge ID: Revenue Category ID. More than one service charge must be comma separated, or space separated. For example, 1:3 2:42 |
|
PostGrossVatRevenue |
Set this field to True to generate the financial bins using gross sales amounts when posting a VAT-mode check to HostType = Info1 or lms_xprop, Note: When this is done, the sum of the financial bins will be greater than the payment amount – because tax is counted twice. (This field was added specifically for V1 Package Redemption) |
Navigate to the Configuration Group submenu.
Select the IAS configuration group configured for PMS from the drop-down list.
In the Tender Mapping submenu, select the tenders configured from the drop-down list.
In the Trickle Posting submenu, map the tenders configured with verification codes 130-133 and any non-PMS tenders configured.
Select Save.
Supported Terminal Options
The following terminal options are supported with this integration:
|
Terminal Option |
Description |
|---|---|
|
74 (Display interactive response). |
If this terminal option is enabled, interactive account name and confirmation prompt are displayed. Use this option with interactive account tenders to display the account name before the transaction is accepted when tendering to an interactive account (i.e., City Ledger, comp). |
|
113 (Replace table number with room number on check). |
If this terminal option is enabled, table number is replaced with room number. The room number displays as the table number on open check buttons, for example, room #105 |
|
116 (Prompt for data entry instead of room) |
If this terminal option is enabled, data input prompt is displayed at the beginning of a transaction. |
|
138 (Allow alphanumeric room - Do not strip leading zeros) |
If this terminal option is enabled, alphanumeric keypad for interactive room input is displayed. |
|
140 (Allow entry of alphanumeric interactive account numbers) |
If this terminal option is enabled, leading zeros are NOT stripped when using a swipe card. |
|
281 (Prompt for interactive account instead of room) |
If this terminal option is enabled, the Account number/name? prompt appears at the beginning of transaction. |
|
284 (Store Posting Account Number After Account Inquiry) |
|
|
315 (Prompt for cover count when performing interactive tender) |
If this terminal option is enabled, the terminal prompts for cover count when performing an Interactive Account or Interactive Room (Host capture) request. |
|
356 (Prevent multiple tenders to same interactive account on check) |
If this terminal option is enabled, the user is prevented from performing multiple authorizations, tenders, or credits to the same interactive account on a single check. |
|
383 (Validate payment amount when accepting a preauth) |
Select this terminal option so that when accepting a preauth, the payment amount (including tip) is validated. This is done to prevent exceeding a limited payment amount (for example, room charge, account charge, and comps). |
|
388 (Prohibit manual entry of interactive accounts) |
If this terminal option is enabled, manual entry of an interactive account number and the ability to look up an interactive account by name are prohibited. |
|
389 (Require manager override to manually enter interactive account) |
If this terminal option is enabled, an employee with a security level less than 5 is required to get a manager override to manually enter an interactive account number or look up an interactive account by name. |
|
425 (Room or folio inquiry lists all configured tenders) |
If this terminal option is enabled, a list of all configured tenders appears for the user to choose from whenever a room or folio inquiry is performed and there is no open check, or when a check type prompts for room at the start of a check. |
|
436 (Prevent the lookup of interactive accounts by name) |
If this terminal option is enabled, an employee with a security level less than five is prompted with a manager override when attempting to perform an interactive account lookup by name. See related options 435, 437, 438. |
|
437 (Prevent the lookup of local rooms by name) |
When this option is enabled, an employee with a security level less than five will be prompted with a manager override when attempting to perform a local room or interactive PMS XML room lookup by name. See related options 435, 436, 438. |
|
1130 (Read room number data from MSR track 1) |
If this terminal option is enabled, room number data (guest charging privileges, and so on.) is read from MSR track 1 instead of track 2. The InfoGenesis default assumes cards are encoded with room information on track 2. |
|
1132 (Read interactive number data from MSR track 1) |
If this terminal option is enabled, interactive number data information is read from MSR track 1 instead of track 2. The InfoGenesis default assumes cards are encoded with interactive information on track 2. |
|
1136 (Read RFID data from Track 2 for Interactive Room via XML Tenders) |
Select this option to capture RFID data from MSR track 2, and post to host Info1 in PMS - XML Interface for Interactive Room via XML Tenders (Tender Verification Code 133). |
|
1505 (Send IAS configuration from the client for post processing IAS events) |
This terminal option allows the POS client to send IAS configuration directly to the server (PPAS) for post processing IAS events. When enabled, the configuration is sent from the client, reducing dependency on server-side reads and improving performance in high-volume transaction environments. When disabled, the configuration will continue to be fetched from the server. |
Configure Tenders
Navigate to POS Configurations ➜ Financials ➜ Tender.
Create tenders configured with the following tender verification codes:
-
133 (Interactive Room via XML)
-
130 (Interactive Account: XML lookup and charging)
-
131 (Interactive Account: XML (charging only))
-
132 (Interactive Account: XML (lookup only))
-
190 (Interactive Account XML Real-time Posting)
-
191 (Interactive Room XML Real-time Posting)
-
192 (Interactive Account XML Auth/Real-time Posting)
For all configured tender records, under the Tender Postings submenu, enter the Site ID as provided by the property.
Select Save.
Configure Terminal Profile Settings
Navigate to POS Configuration ➜ Profiler ➜ POS Terminal.
Navigate to Files ➜ Settings.ini.
Under the Settings section, set SendTricklePostingtoIAS to True.
Select Save.
Implementation at POS Terminal
Room Inquiry
A room inquiry is performed to confirm a guest’s room registration. This function allows the user to look up a guest using their room number, tag the guest to a check, preauthorize the check, and post the charges to their room. It is also used to start a new check.
Perform the following steps to make a room inquiry:
Create a check and add items or recall a check. The check need not have to have items ordered on it.
Select the Room Inquiry function. The Select Authorization Tender prompt is displayed. It displays the interactive room tenders.
Select a tender. The Room Inquiry prompt is displayed.
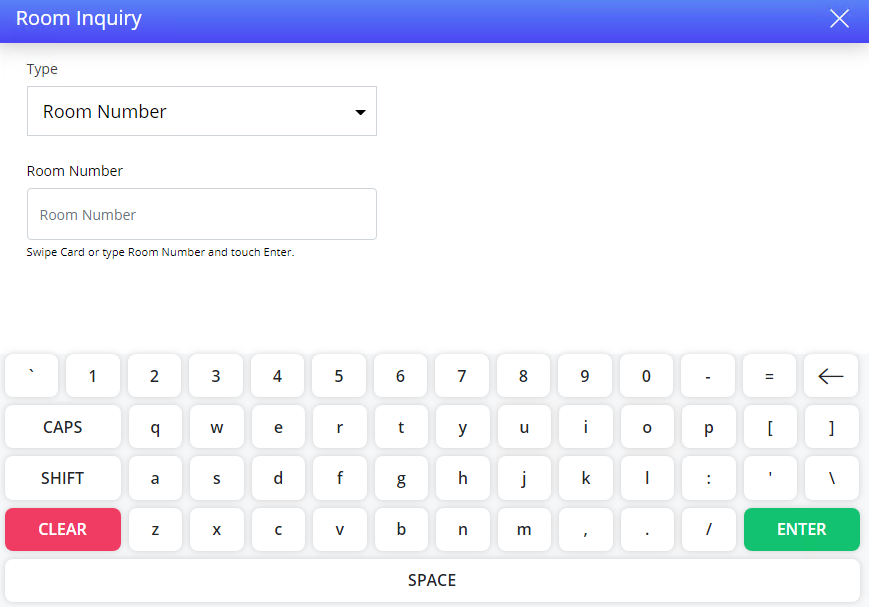
Select Room Number or Guest Name in the Type drop-down.
Enter the room number or the name of the guest based on the input selected. The matching results are displayed.
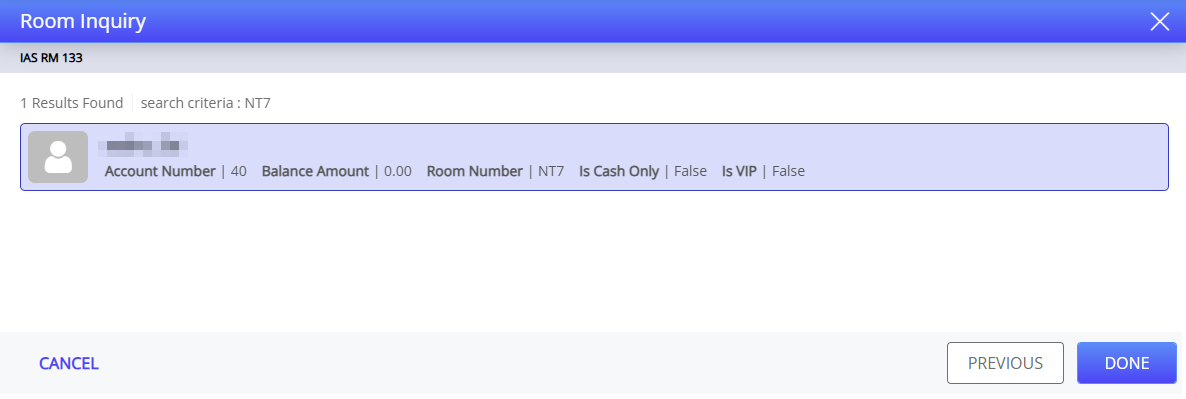
Select the appropriate guest. The Guest Information prompt is displayed. It displays the selected guest’s room number, account number, and the balance available in their account.
The following checkboxes are also displayed:
|
Field |
Description |
|---|---|
|
Is Cash Only |
When this flag is enabled for a guest, charging is denied, a message, Charging at this profit center is not allowed is displayed when the user tries to tag this guest with a check. |
|
Is VIP |
When this flag is enabled for a guest, it indicates that the guest is a VIP. |
Select OK. The check is authorized, and the guest is associated with the check.
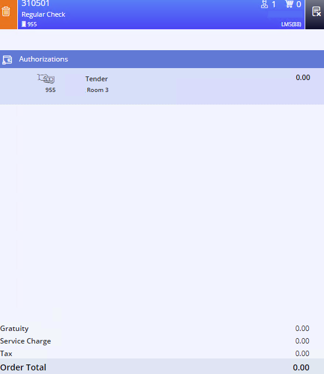
Recall the saved check. If there are any changes to be made to the check, it can be done now.
Navigate to the Functions screen and select Accept. The Tender Existing Authorizations screen is displayed.

Select the authorization available in the check and select Accept. The Confirm Tendering prompt is displayed.
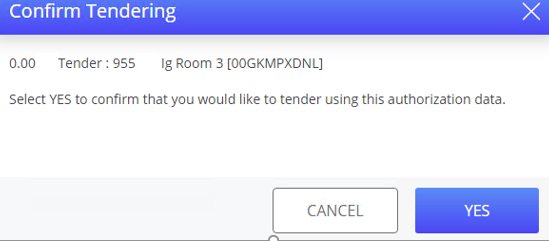
Select Yes. The check is tendered successfully, and the charges are posted to the room.
When the Room Inquiry function is selected without a check that is currently open, the Start Check prompt is displayed when OK is selected in the Guest Information prompt.
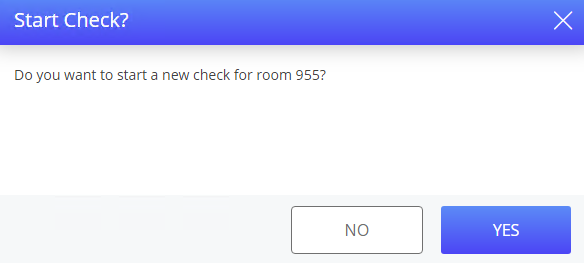
When Yes is selected, a new check is started, and the authorization tender is applied on the newly started check.
To modify the authorization available in the check before tendering, the Authorization function must be selected again. The list of authorizations available in the check are displayed again so the user can perform a re-auth, void or print the existing authorization.
Guest Inquiry
The guest inquiry is performed to find out detailed information about a guest, such as information about guest arrival, departure, and any package deals associated with the guest.
Perform the following steps to make a guest inquiry:
Select the Guest Inquiry function. The Select Tender prompt is displayed. It displays the interactive room tenders.
Select the appropriate tender. The Guest Inquiry prompt is displayed. The terminal lists all accounts that meet the search criteria.
Select a guest from the available list.
Enter the room number or the guest name. The Guest Information prompt is displayed.
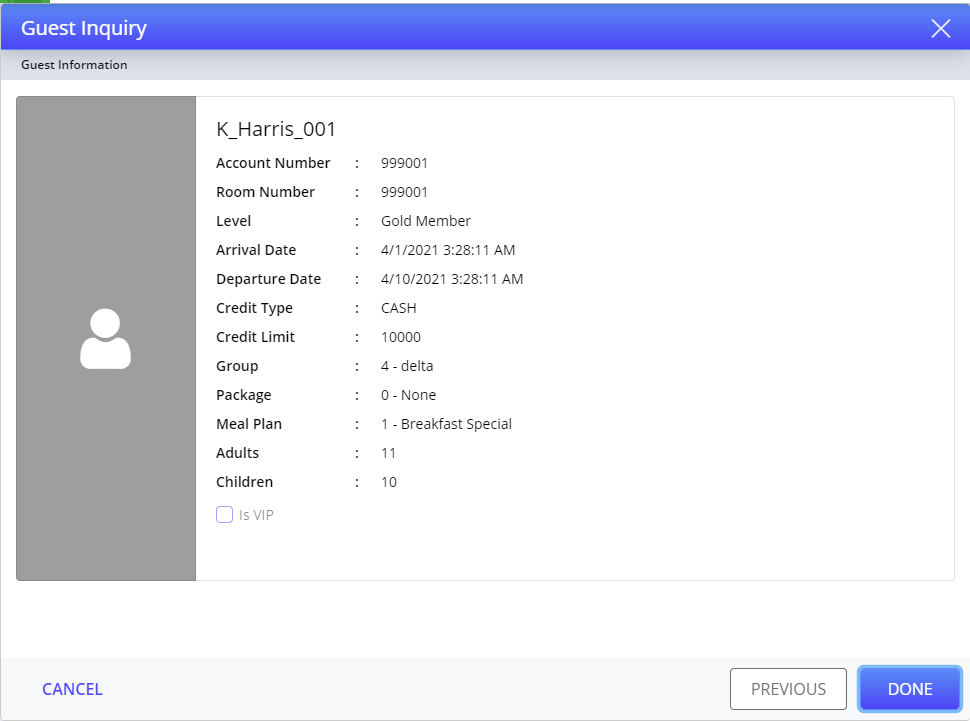
Apply Room Charge
Create a check and add items or recall a check. The check need not have to have items ordered on it.
Navigate to the Tenders screen and select a tender with Tender Verification Code 133 (Interactive Room via XML) from the PMS section. A prompt is displayed.
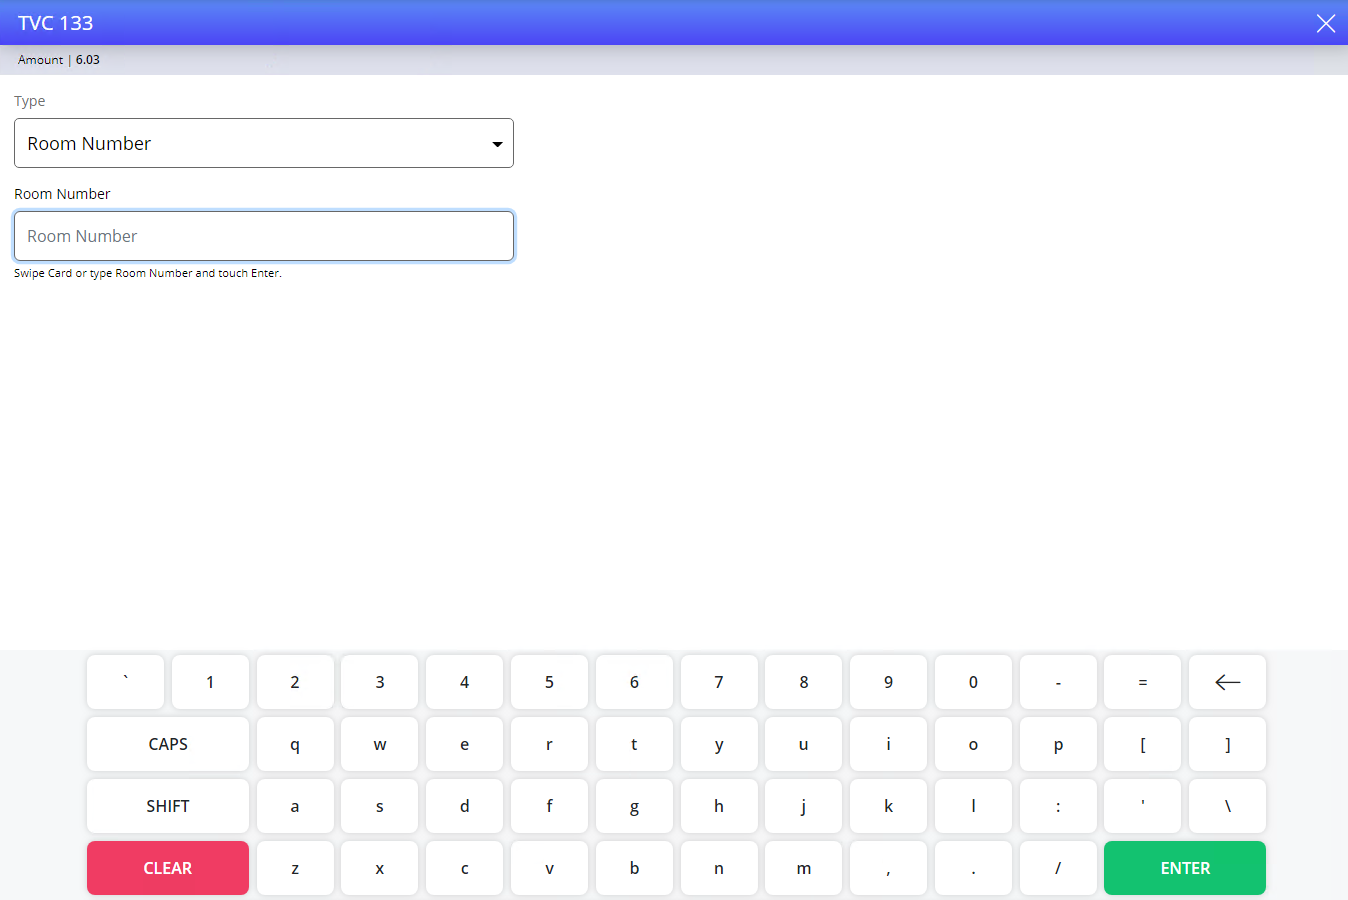
Select Room Number or Guest Name from the Type drop-down.
Enter room number or guest name based on the selection and select Enter. The guest information is displayed.

Select Done. The check is tendered, and the charges are posted to the room successfully.
For interactive account real-time posting, apply the tender with Tender Verification Code 191. Interactive Room XML Real-time Posting.
Tender Verification Code 133 supports up to 30-character input for the room number at the POS terminal while performing a Room Inquiry.
Account Lookup and Charging
Create a check and add items.
Navigate to the Tenders screen and select a tender with Tender Verification Code 130 from the PMS section. A prompt is displayed.
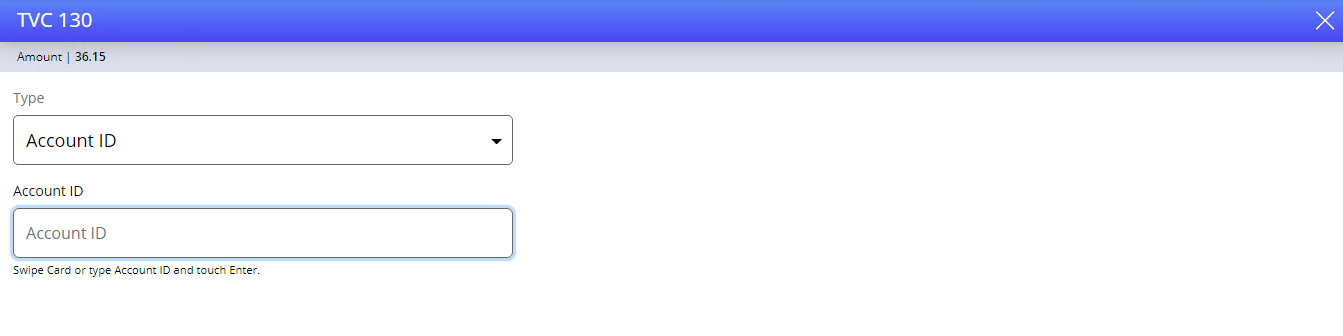
Select Account ID or Name in the Type drop-down.
Enter the Account ID or Name based on the selection.
Select Enter. The guest associated with the account is displayed.
Select Done. The Confirm Account Charge prompt is displayed.
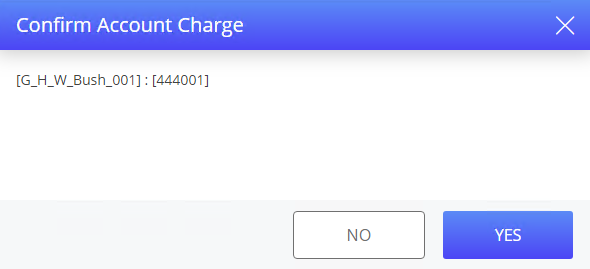
The guest is associated with the check the check is tendered.
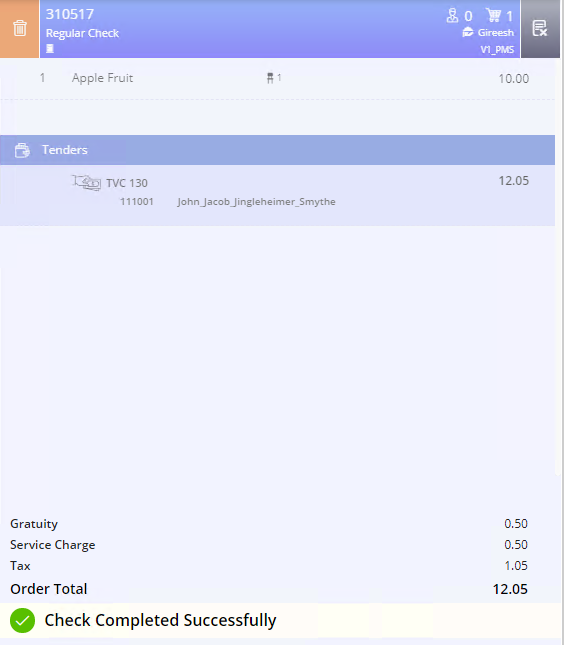
Apply the tenders with Tender Verification Codes 131 and 132 on check to perform account lookup only and account charging only respectively.
For interactive account real-time posting, apply the tender with Tender Verification Code 192. Interactive Account XML Auth/Real-time Posting